
Baking recipes
Scroll through our posts below to try all sorts of delicious baking recipes from our instagram baking videos. New baking videos are posted the first week of each month on Instagram and Facebook.
To easily find one of our recipes type below:
Hey! Nice (Cinnamon) Buns!
Cinnamon buns…can you think of a GREATER bun?! The answer is no! Sweet, soft and oh so gooey! They are the perfect breakfast, lunch or dinner! This recipe has a delicious layer of “goo” aka caramel on top (some might call it a sticky bun!), but if you are more of a cinnamon bun with icing type of person, omit the goo and top with your favourite icing instead.

Yield: 12 buns (or you can make 8 ginormous buns)
Ideally use a 9”x13” pan but you can probably use 2 pie pans if you don’t have one
Dough:
3 cups All purpose flour
1/4 cup milk powder
1 1/2 teaspoons salt
2 teaspoons or 1 packet Instant Yeast
2 Tablespoons Sugar
1 1/4 cup milk, warm to the touch but not boiling
1 egg
1/4 cup butter, melted
In the bowl of an electric mixer, place the milk, egg and melted butter.
In another bowl toss together the flour, milk powder, salt, yeast and sugar just to combine.
Pour the dry ingredients on top of the liquid ingredients in the mixer bowl and then mix using the dough hook attachment for 5-10 minutes, or until the dough forms a smooth ball. The dough will still be a little sticky.
Place the dough into a greased bowl and cover. Let rest at room temperature for about 1 hour or until doubled.
Goo:
1/3 cup butter
1/2 cup Brown Sugar
1/2 cup Corn syrup, honey OR maple syrup
1/4 cup heavy cream (if you don’t have cream, omit this and increase your butter to 1/2 cup)
pinch of salt
Combine all the ingredients: butter, brown sugar, syrup, cream and salt in a small pot.
Bring to a boil while stirring, basically we are melting the butter and sugar together, so you don’t need to cook it very much. You can also do this in the microwave if you prefer.
Pour the goo into a greased 9”x13” pan and set it to the side until your dough is ready.
Filling/Assembly:
1/3 cup - 1/2 cup Butter, very soft basically you want it to be the texture of mayonnaise, so almost melted
3/4 cup - 1 cup Brown sugar
1-2 Tablespoons Cinnamon
1/2 cup Add-in (optional): toasted pecans, toasted walnuts, raisins, chocolate chips, OR dried fruits
Once your dough has doubled in size place it onto a lightly floured surface and shape it into a rough rectangle shape. Then roll out into a large rectangle using a rolling pin or wine bottle, whatever you’ve got on hand! Since we are making 12 buns, make sure your rectangle is at least 12” wide, but if it gets a bit longer that is no problem. Mine probably was about 15”x9” in the end.
Smear your super soft butter all over your rectangle but leave a strip about 1” wide across the top edge without any butter. This strip is going to be the end edge of our roll which we will use to stick the dough to itself and seal the log.
On top of the butter sprinkle a nice even layer of brown sugar all over, depending on the size of your rectangle you might need a little more sugar, or a little less, but as long as it’s nicely covered you are set, the measurements for the filling are more by feel, so if you have leftover don’t worry!
Next, sprinkle the cinnamon all over the sugar to your liking. If you are putting any add-ins into your cinnamon buns, you can sprinkle them all over the cinnamon sugar layer now as well.
Now time to roll! Starting at the edge closest to you, move from one side to the other, rolling the dough on top of itself, tucking in the dough into the layer of cinnamon sugar, until you reach the top edge that doesn’t have any butter on it. Your dough should look like a big wormie and be lying on top of the un-buttered strip of dough.
For ease, I like to roll my wormie over so the edge of the dough is on top, then you want to seal the dough together by pinching it all the way from one side to the other so it won’t unravel when we cut it.
Now using your sharpest knife cut the wormie into 12 even-ish pieces. The easiest way for me to do this is to cut the wormie in half, then you will have 2 pieces. Now, take each of those pieces and cut them in half, so now you should have 4 even-ish pieces. Then cut each of those 4 pieces into thirds. Viola! 12 even-ish pieces!
Now grab your pan that has the goo at the bottom (or if you don’t want goo, just make sure your pan is very well greased, or lined with greased parchment). Place your buns cut side down in the goo into the pan, in a 4 across and 3 down pattern.
Cover the pan and let sit at room temperature until doubled and starting to reach the top edge of the pan, about 1 hour. If you want to serve these for breakfast, make your buns the day before, then cover them and place into the fridge overnight. In the morning, take your buns out about 2 hours before baking so they can come up to room temperature and then continue to proof so they are doubled and reaching the top edge of the pan.
While your buns are rising, pre-heat your oven to 350*F.
When your buns have doubled, pop the pan onto a cookie tray (this is purely to catch caramel drips from falling into your oven which would be the worst to clean…speaking from personal experience) and then place the pan with cookie tray into the middle of the oven and bake for 20-30 minutes or until golden brown and sounding hollow when you tap on the dough.
Let the pan sit for about 5 minutes at room temperature so it’s not boiling and then using oven mitts and being EXTREMELY careful, place a baking tray or a large platter (something that is larger than your cinnamon bun pan so it can catch the caramel) on top of the cinnamon buns, and flip them over and remove the baking pan. All your buns and delicious caramel should pour out onto the baking tray/platter, but if there are a few stragglers, just grab a spatula and scrape them out.
Now time to devour these delicious babies! Best served warm!
Bread Pudding with the EASIEST Caramel Sauce!
I never had bread pudding growing up, but once I went to pastry school I was like “omg what have I been missing!” Bread pudding is basically like french toast, but instead of slices of bread, you cube up all your old dry bread and soak it in the custard, then place it into a baking pan and bake until custardy! Delicious! To top it off I make the easiest caramel sauce, just pop everything in a pan and bring to a boil. Easy and impressive dessert, what more could you want!
For the type of bread, you can use anything, I had some leftover sourdough bread, but I’ve used white bread, banana bread, even croissants! They are all yummy!
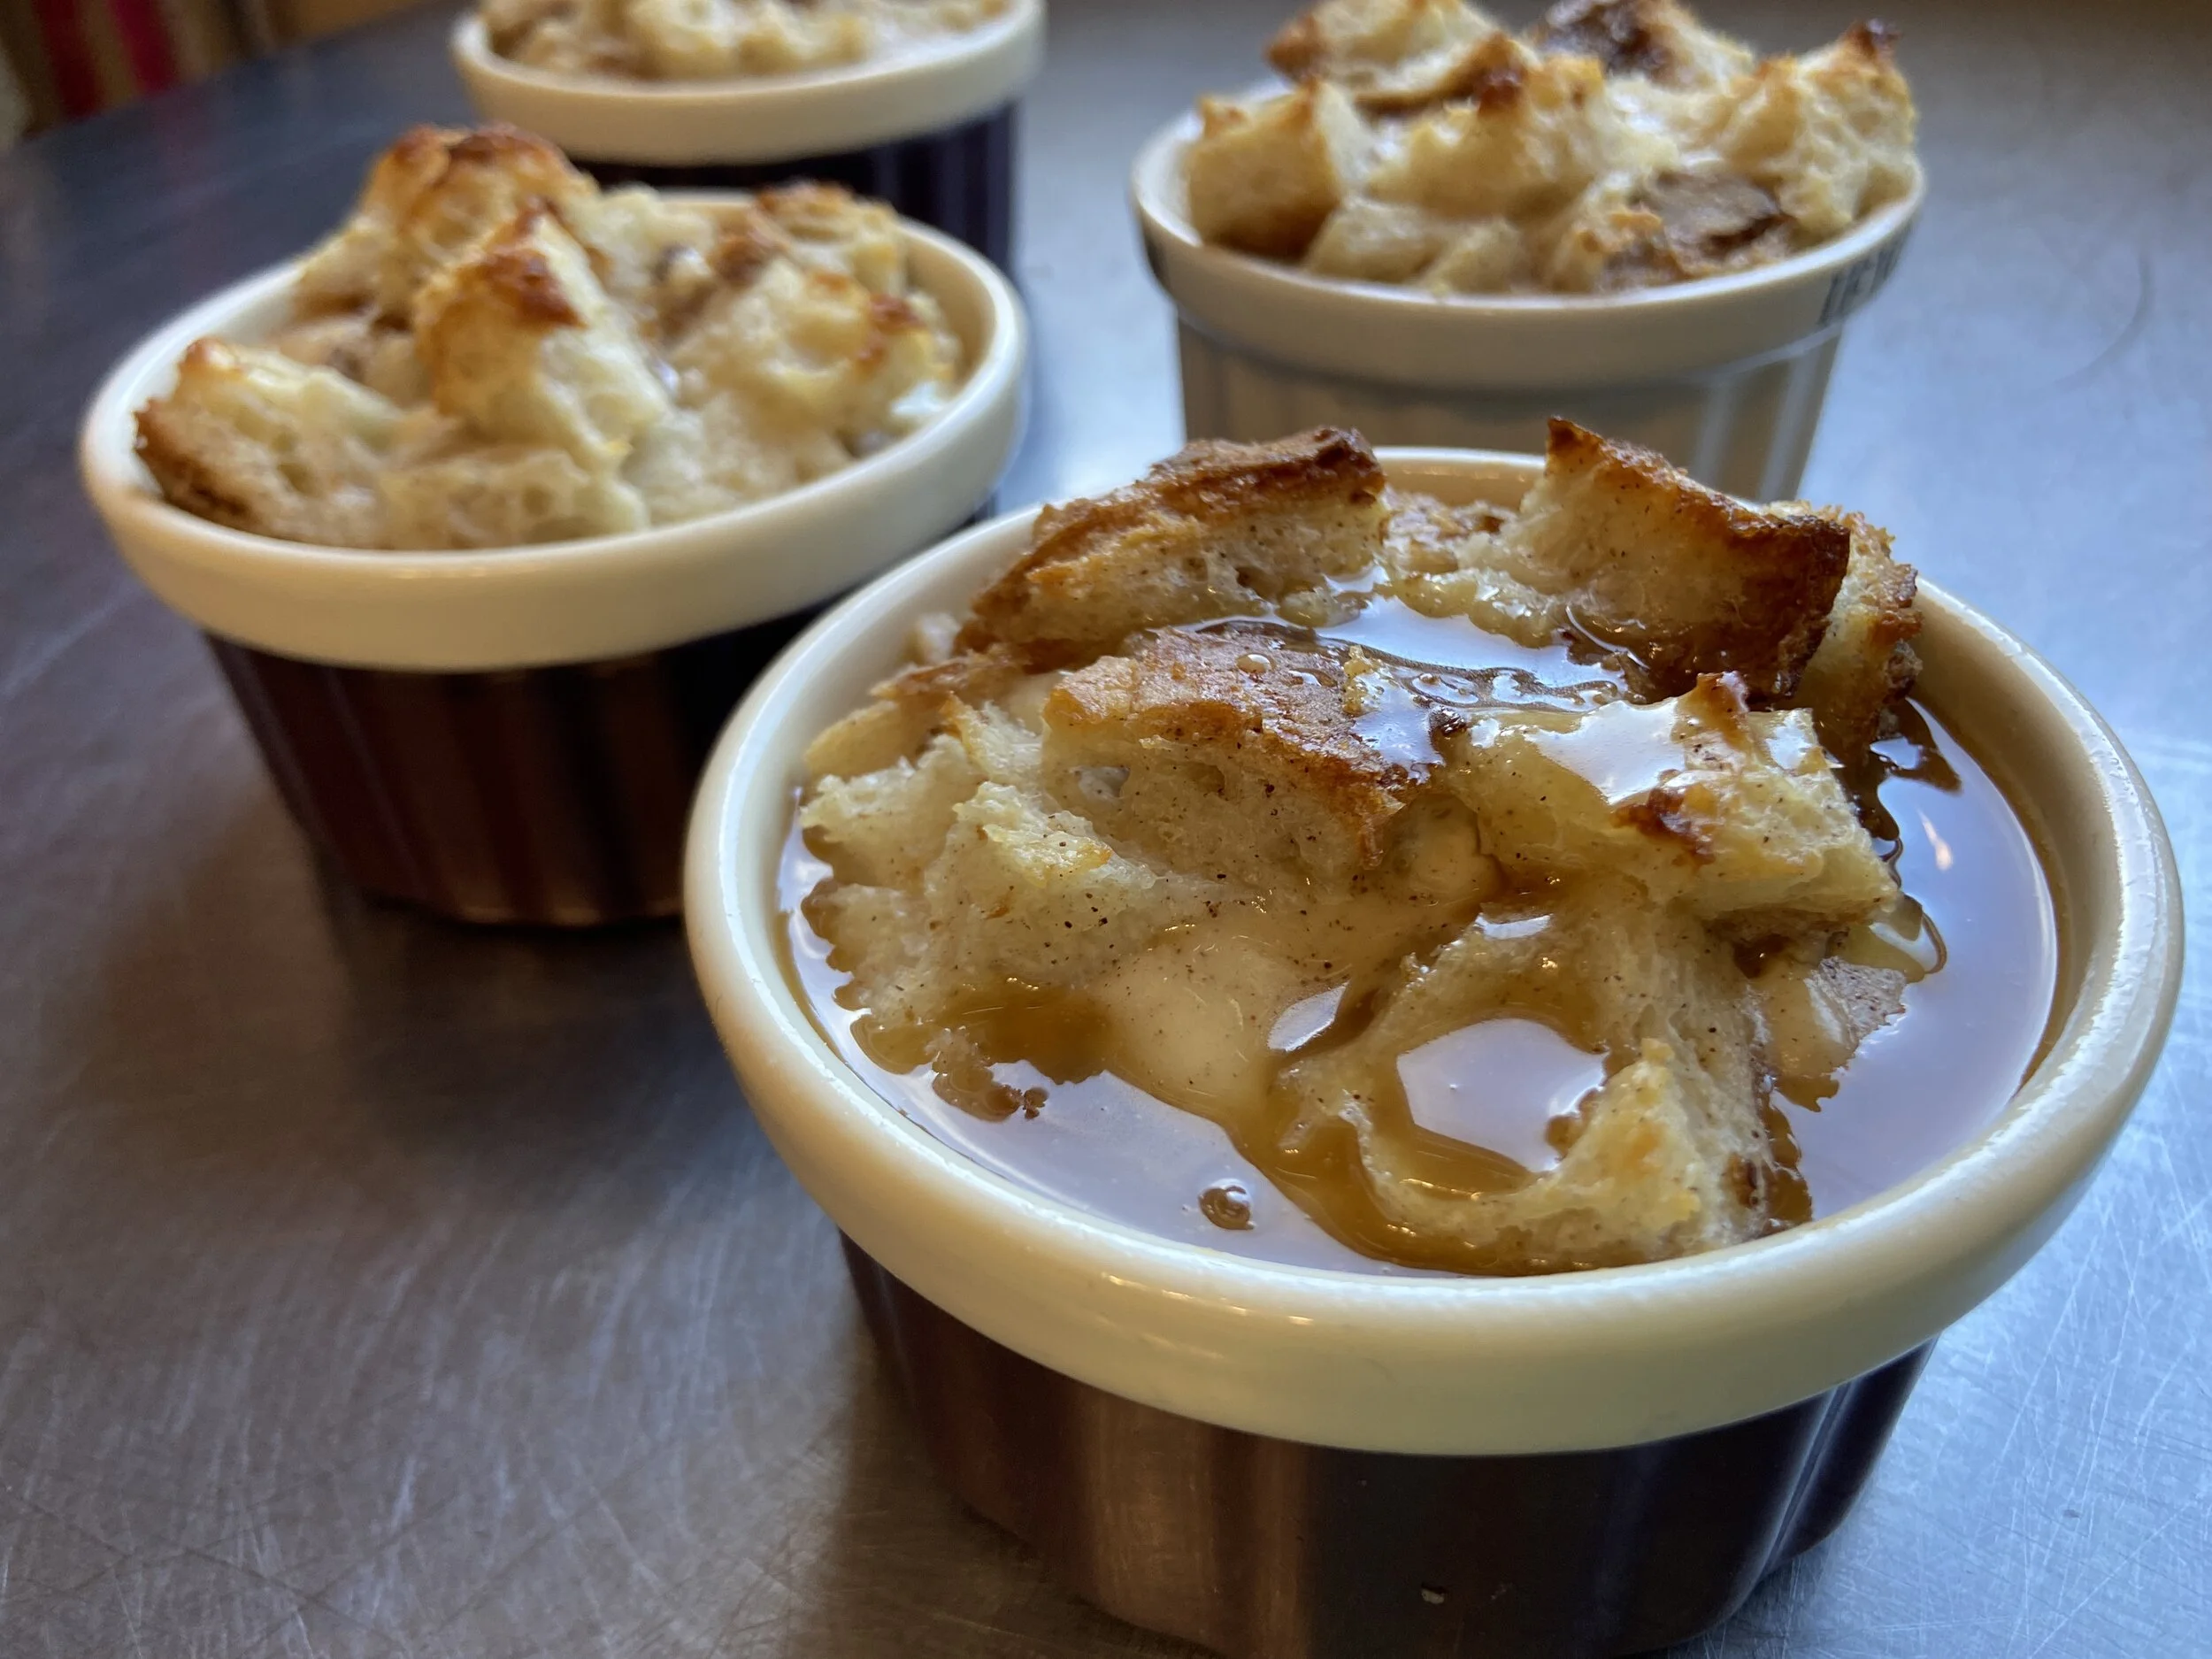
ALL the caramel sauce on my bread pudding!
Bread Pudding with Caramel Sauce
Yield: 4 Ramekins
Preheat your oven to 350*F
Bread Pudding:
3 Eggs
1/3 cup Sugar
pinch of Salt
1 teaspoon Vanilla (optional)
1/2 teaspoon Cinnamon
1 cup Milk
1/2 cup Cream (or milk if you don’t have cream)
4-5 cups of cubed dry bread (if it’s not stale, pop it in the oven for a few minutes to dry them out for maximum custard absorption!)
Caramel sauce:
2/3 cup Brown Sugar
1/2 cup Whipping Cream
1/4 cup Butter
1 teaspoon liqueur like dark rum or whiskey (optional)
In a bowl combine your eggs, sugar, salt, vanilla, cinnamon, milk and cream. Whisk until combined.
Toss in your cubed bread and stir until coated. Let sit at least 20 minutes to absorb the custard.
Scoop your bread mixture into 4 greased ramekins (or whatever baking vessel you are using). Pour over any excess custard left in the bowl to fill up the ramekins.
Place the ramekins into a larger pan where they can sit flat without touching (I used a 9”x13” cake pan).
Place the pan with ramekins into the preheated 350*F oven and then fill the pan with hot water until it reaches about halfway up the side of the ramekins. This is called a water bath.
Bake for about 35-45 minutes, or until lightly golden and the custard is set in the middle. If you push down on the middle of a ramekin it shouldn’t look super liquidy.
Remove from water bath and let cool or eat straight away!
To make caramel sauce, place your brown sugar, cream and butter in a pot and bring to a boil.
Remove from heat and stir in the liqueur if you are using it.
Pour over your delicious baked bread puddings and eat warm.
Honeycomb Toffee!
Buzz! Buzz! It’s honeycomb time! This candy is a delicious honey flavoured, honeycomb looking treat! Some people call is “sponge toffee” or “sea foam” because it’s light and airy! This treat is perfect for eating on it’s own, but it’s also great covered in chocolate, crushed up on ice cream, put into cake layers, in my world it’s the perfect accent to any dessert!

It’s the bee’s knees!
Honeycomb Toffee
Yield: about a 12”x10” rectangle
1 1/4 cup Sugar
1/4 cup Corn Syrup
1/4 cup Honey
1/4 cup Water
1 Tablespoon Baking Soda
In a 2-3 qt. pot place your sugar, corn syrup, honey and water. Stir to combine and make sure all your sugar gets wet, then scrape down the sides so there aren’t any clumps of sugar sticking to them.
Line a baking tray with a silicon pad or a piece of parchment and grease with baking spray or oil/butter. Place next to your stove.
On a high heat, cook your sugar mixture until it reaches 300*F with a thermometer, this is called the “hard crack” stage, remove from the heat.
Quickly whisk in your baking soda and it is going to start GROWING! Be careful this is still SUPER HOT! Quickly pour your honeycomb onto the greased and lined baking tray. Don’t smooth out, just let it go where it may, the more your smooth, the less bubbles you will have.
Let cool for about 2 hours, then crack into pieces and store in a sealed container.
Cheese Crackers!
Who doesn’t love cheese crackers, a favourite since the days of eating handfuls of goldfish crackers on the playground! These delicious cheesy crackers can be modified to incorporate whatever grate-able cheese you have in the fridge, which results in SO many fun flavours! I went with cheddar and parmesan because that’s what I had on hand, and as we know, it’s quarantine so I am avoiding the store.

Little cheese bites!
Cheese Crackers
Yield: depends on how you cut them, lets say about 100 small crackers!
Preheat your oven to 350*F
1/2 cup Flour
1 teaspoon Sugar
1/2 teaspoon Salt
1/4 teaspoon Baking Powder
1/4 teaspoon Smoked Paprika (you can leave this out or replace it with other spices, things like onion or garlic powder, italian seasoning, cajun seasoning, even rosemary or thyme would be good!)
2 Tablespoons Cold Butter, cubed
about 115g Cheddar Cheese, grated on the smallest sized grater you have (you can replace this with another cheese such as swiss, mozzarella, havarti, whatever you got!)
2 Tablespoons grated parmesan (optional)
1-2 Tablespoons of cold milk or water
Coarse salt for the tops
In a bowl combine all your dry ingredients - flour, sugar, salt, baking powder and smoked paprika (or other spices)
Toss in your cold butter and cheese and combine together by pinching and rubbing the dough with your hands until it looks like coarse sand. We ideally want there to be no large butter chunks left but it still looks crumbly.
Now add your milk (or water) a little bit at a time, I used about 1.5 Tablespoons, but it will vary depending on how dry your cheese is, something like an old cheddar or a parmesan is going to need a little more moisture, while something like a havarti is not as dry and will need a little less. So just add a little bit at a time, stirring them together until you can grab a ball in your hand and when squeezed it will stay in a ball.
Press the dough together into a disk and wrap with saran wrap and chill for at least 30 minutes.
Roll out your dough onto a lightly floured surface and cut into small squares using a pizza cutter, or whatever shape you like!
Bake in a preheated 350*F oven for about 10-15 minutes or until lightly golden on the bottom and cheese-y smelling!
Let cool and eat! Store any extras in an airtight container or baggie.
Pavlova!
Pavlova is the fluffiest of cakes! It’s a GIANT meringue with a marshmallowy centre that you fill with whipped cream and top with fresh fruit! It’s our favourite dessert for any bakery staff party! Named after a ballerina’s fluffy tutu this cake is as light as air!

it’s a mountain of deliciousness!
Pavlova
Yield: 1 approximately 8” round pavlova
Preheat oven to 300F, then reduce to 250*F when you place the pavlova into the oven.
Pavlova:
5 Egg Whites, room temperature
pinch Salt
1 teaspoon Vanilla extract (optional)
1 cup Sugar
1 teaspoon Vinegar
1 Tablespoon Cornstarch
Filling:
1/2 cup Whipped cream
1-2 Tablespoons Sugar
1 cup Fresh Fruit
1 Tablespoon Sugar
In the bowl of your mixer place your egg whites and the pinch of salt.
Using the whisk attachment, whip the egg whites until they start to turn white and foamy.
While the machine is running on a low speed, slowly pour in the sugar until it is fully incorporated, then increase the mixer speed to medium high speed and whip until super thick and fluffy, at least 10 minutes. The meringue should not feel grainy when you rub it between your fingers.
Add the vinegar and cornstarch to the mixer and mix on a medium speed for 20-30 seconds until combined.
Using a bowl or plate, trace an approximately 8” diameter circle onto a piece of parchment paper, then flip oven the parchment so the outline is on the bottom of the paper, and place the parchment onto your baking tray. You can use a little baking spray on the pan to stick down your parchment so it won’t slide.
Load your meringue mixture onto your drawn circle on the parchment. Then gently spread it into the circle shape. You can use the back of a spoon or a spatula to create decorative lines on the side of your pavlova, or just leave it with a rustic look.
Place pavlova into a preheated 300F oven, then as soon as the pavlova is in, REDUCE the heat to 250*F and bake for 1.25-1.5 hours. The pavlova should be crispy feeling on the outside.
Turn off the oven, but leave your pavlova in the oven to cool - about 2 hours (or just leave overnight.)
Once your pavlova has cooled, whip your cream to soft peak and sweeten to taste with sugar (1-2 Tablespoons if usually good for me), place the whipped cream on top of the pavlova.
Chop up your fresh fruits and toss with a little sugar to taste - if your fruit is sweet enough don’t worry about adding any sugar. Place fruit on top of the whipped cream.
Serve right away! So delicious!
Mud ball Cookies aka Easter Nests!
Mud ball cookies, sounds like your eating mud, but they’re actually a delicious chocolate coconut oatmeal cookie! This recipe is from my mom! We made them ALL the time growing up, and they are still a favourite today. They are a great cookie because they are quick to make and don’t involve any baking! Today we shaped them into nests with little mini eggs in the centre, but you can just scoop them and eat them without any chocolate eggs on top. These are also egg free and wheat free, which is great for anyone with allergies!

The most delicious bird’s nest you will ever eat!
Mud Ball Cookies
Recipe courtesy of Patty Lotecki - mama extraordinare
Yield: about 12 nests, or 24 smaller cookies
No oven required for these cookies!
1/4 cup Butter
1/4 cup Milk
3/4 cup Sugar
1 1/2 cups Oats (quick or rolled, both work great)
1/4 cup Cocoa Powder
1/2 cup Coconut (sweetened or unsweetened)
pinch Salt
1 teaspoon Vanilla extract (optional)
Mini Eggs for garnish (optional)
In a pot heat bring your butter, milk and sugar to a boil, then boil for 1 minute while stirring.
In a bowl combine all your dry ingredients - oats, cocoa, coconut, and salt. Stir to combine, breaking up any cocoa balls.
Once your butter mixture has boiled, pour it into the dry ingredients and add your vanilla extract. Stir until everything is well combined.
Grab a baking tray lined with parchment, and scoop your batter into little mounds on the tray. I used an ice cream scoop, but two spoons work great too! Then press the centre of each mound down slightly so it looks more like a nest shape.
Place a few mini eggs in the centre of each mound like eggs would be placed in a nest.
Let them cool at room temperature for about 2-4 hours, or until set and you can remove them from the parchment paper.
Eat! You can also store these in a sealed container…if you don’t eat them all!
Mini Egg Nanaimo Bars!!!!! Yes, you read that correctly!
Mini eggs - they’re my addiction! Normally I would be in the midst of making a zillion mini egg cakes and bunny shaped sugar cookies, but alas it’s quarantine! Now I have a ridiculous amount of mini eggs and all I want to do is eat them by the handful…which I do, but we should bake some too! Genius idea - MINI EGG NANAIMO BARS! It came to me as I was eating mini eggs out of a bowl like they were cereal and they are HEAVENLY!

Mini Egg Nanaimo Bars before slicing!
Mini Egg Nanaimo Bars
Yield: 8”x8” pan
Preheat your oven to 350*F
Base:
1 cup Graham Cracker Crumbs
3/4 cup Sweetened Coconut (or unsweetened)
1/2 cup Toasted Almonds, chopped up (can substitute another nut, or replace with graham cracker crumbs)
1/4 cup Cocoa Powder
1/4 cup Sugar
1/4 teaspoon Salt
1/3 cup Butter, melted
1 Egg
Icing Filling:
1/2 cup Butter, soft
2 Tablespoons Hot Chocolate Powder (or 1 Tablespoon Cocoa powder)
2 Tablespoons Milk
1 teaspoon Vanilla
2 cups Icing Sugar
1/4 cup Crushed Mini Eggs (I crushed them in a food processor)
Chocolate Topping:
3/4 cup Dark Chocolate (semi-sweet Chocolate chips will work great!)
1.5 Tablespoons Butter
2 Tablespoons Crushed Mini eggs
Roughly chopped mini eggs for top decor ~ 1/4 cup
In a bowl combine the base dry ingredients - graham cracker crumbs, coconut, almonds, cocoa, sugar, and salt. Stir to combine.
Add your melted butter and egg, and stir until combined.
Pour your base mixture into a parchment lined 8”x8” baking pan, and using your hands press it evenly over the base of the pan until its evenly covered and compacted.
Bake your base for about 10-15 minutes until it feels firm and you can’t see any liquid bits. Let cool.
Once your base is cool, in the bowl of a mixer combine your icing filling ingredients. Start with the milk and hot chocolate powder, stir them together to moisten the powder, then add all the other ingredients - butter, icing sugar, mini eggs, and vanilla extract. Mix on medium high speed until light and fluffy looking 4-6 minutes.
Smear the icing filling on top of your cooled base and evenly spread it out, trying to make the top as smooth as possible. Chill until firm, at least 30 minutes.
In a microwaveable bowl, or a double boiler (if you want to use a stove), melt together your chocolate and butter until fully melted.
Stir in the crushed mini eggs to the chocolate and quickly spread on top of the firm icing layer.
Sprinkle with more chopped mini eggs!
Chill until set, ideally 4 hours.
Cut and eat! These also freeze great!
Granola Bars - dreaming about when we need quick breakfasts again!
Granola bars are my go to breakfast when I am not stuck in my house avoiding the general public and daily life…oh the days before social distancing, seems like so long ago…it was only 4 days…just a few more to go, right! These babies are easy to prepare and then once cooled you can wrap them up individually and pop them in the freezer, all ready to go for easy snacking!
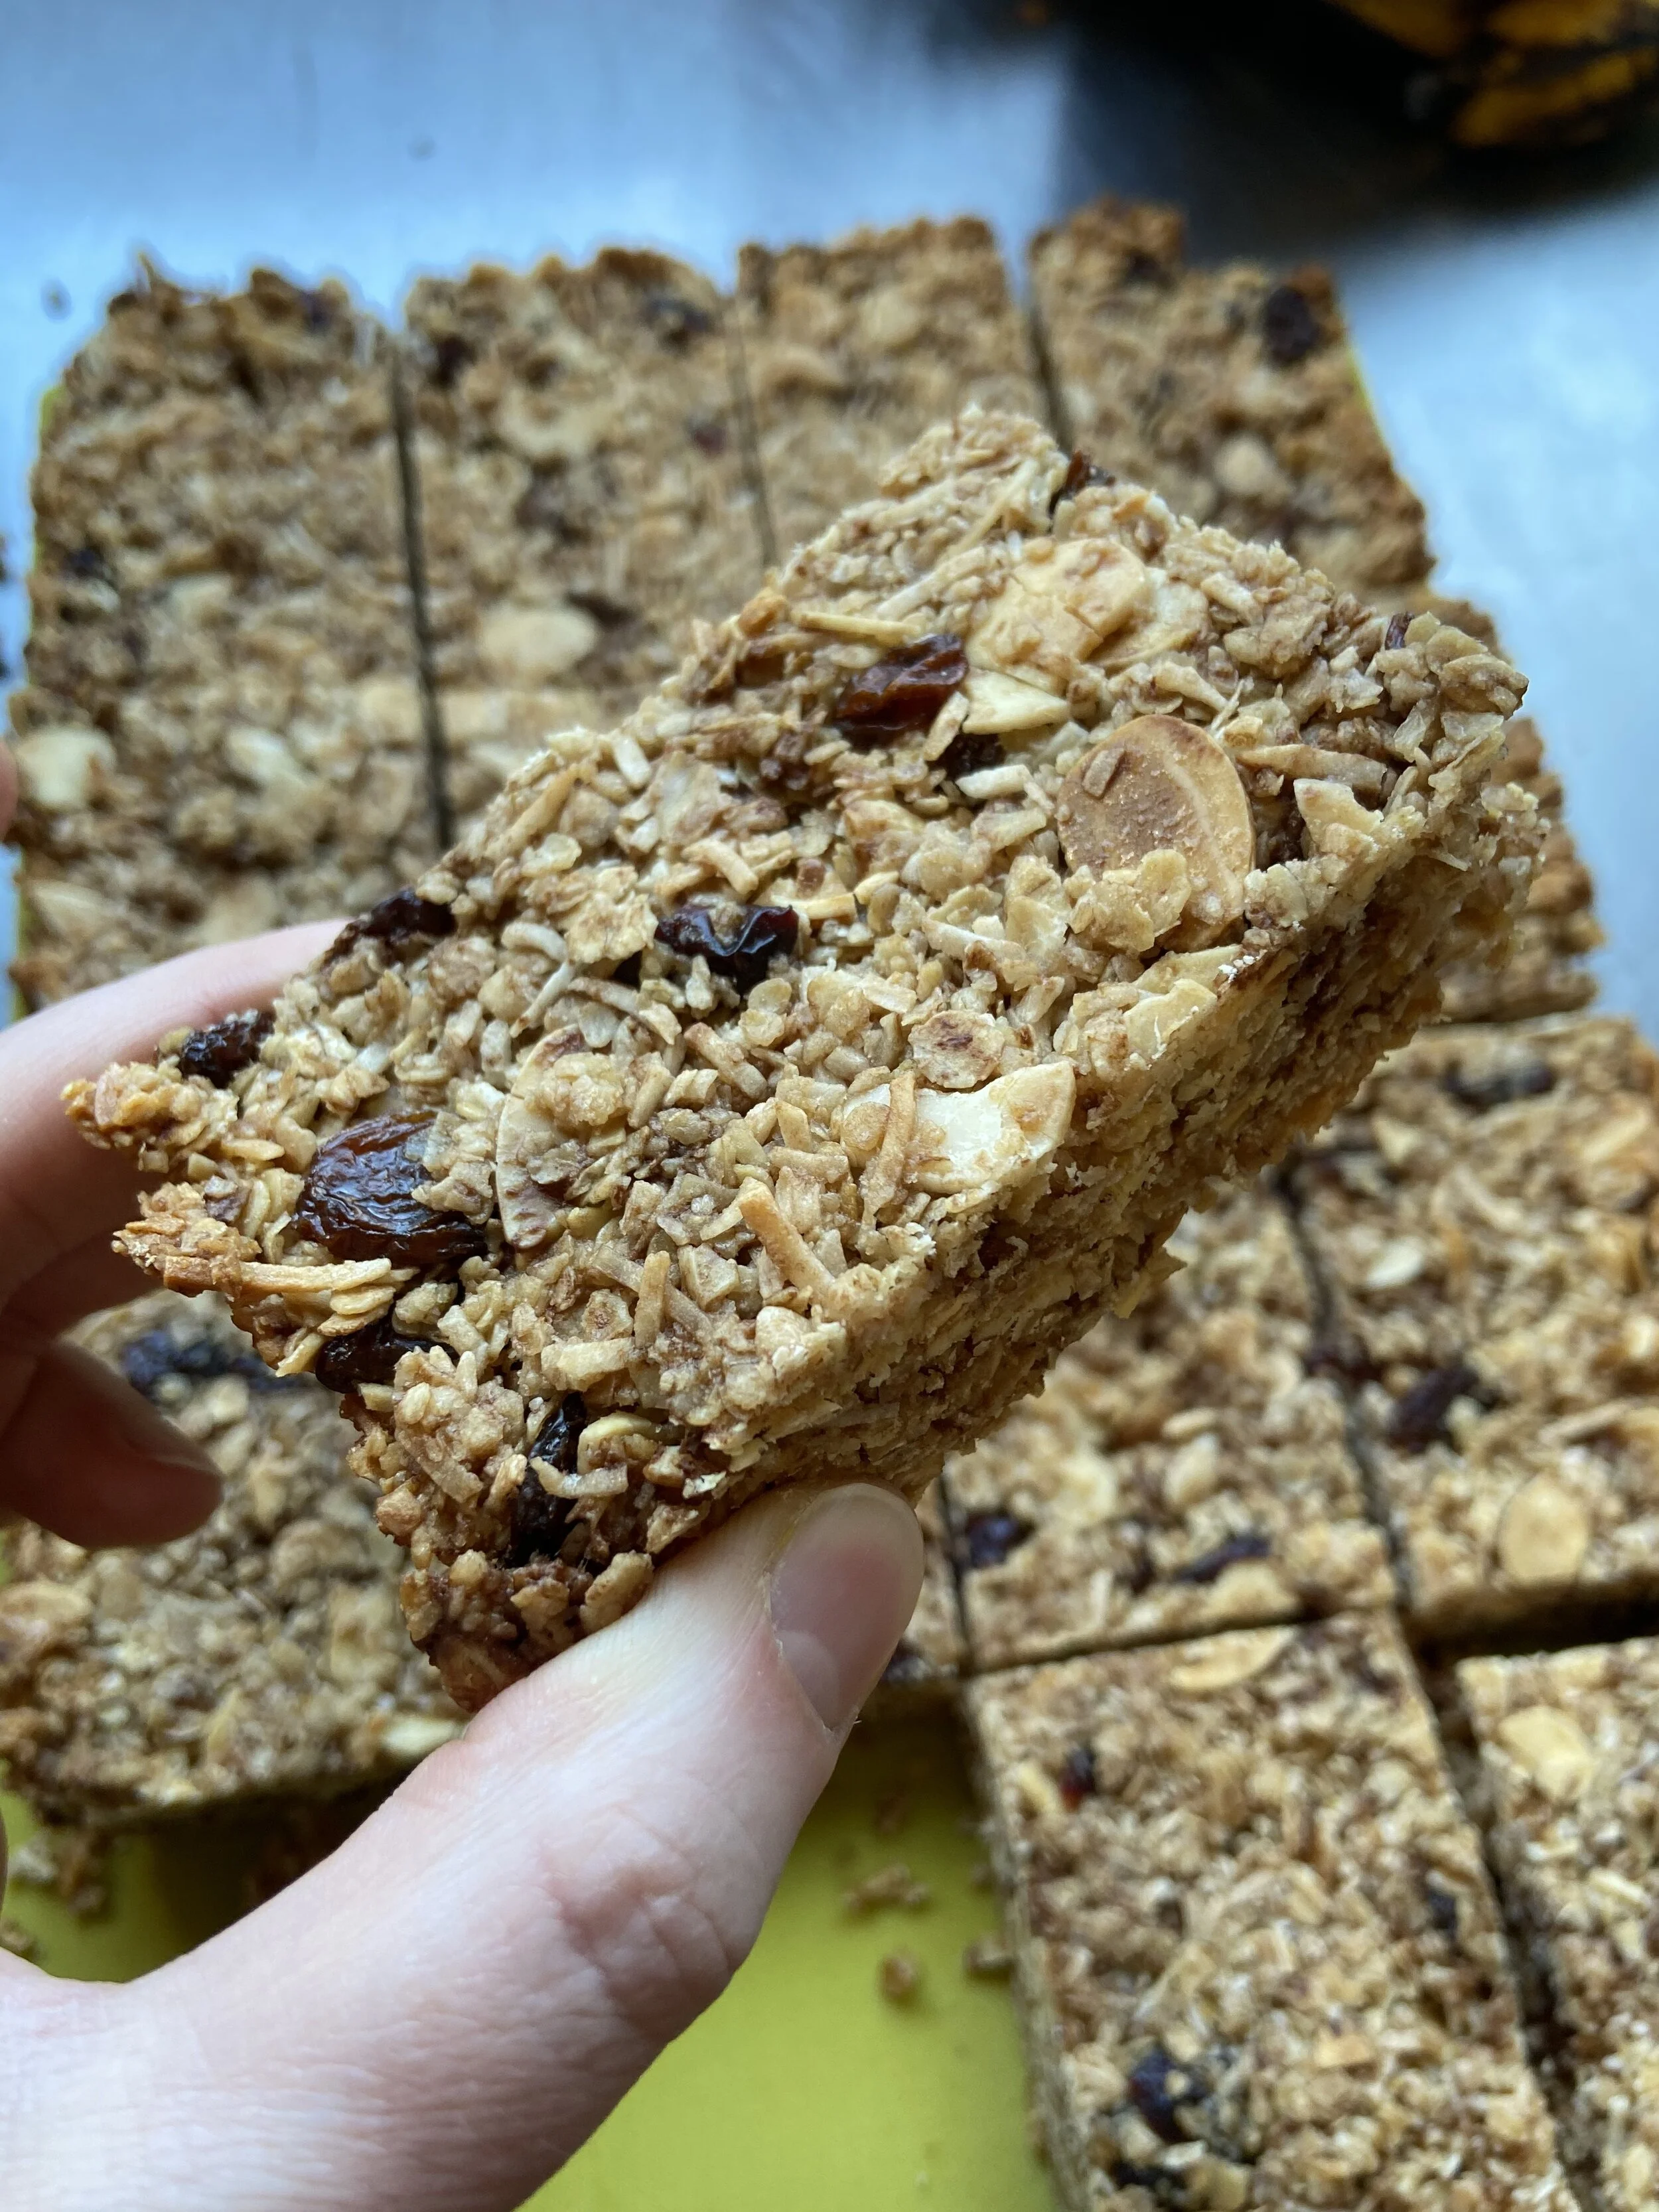
Granola Bars!
Granola Bars
Yield: 9”x13” pan
Preheat your oven to 350*F
1/3 cup Butter
1/3 cup Brown Sugar
3/4 teaspoon Salt
1 cup Honey or Maple Syrup (if you don’t have enough of either you can supplement with corn syrup, it just doesn’t have as much flavour)
4 cups Oats- ideally old fashioned rolled oats, but use what you have, we’re in quarantine!
2 cups almonds or other nut, toasted lightly in the oven
2 cups shredded Coconut
1 1/3 cup Dried Fruit - I used a mix of dried cranberries and raisins, with a little bit of chocolate chips!
In a saucepan place the butter, brown sugar, salt and honey. Bring to a boil.
While that is heating, mix together the oats, almonds, coconut and dried fruit to combine.
Pour the honey butter mixture on top of the oat mixture and stir to combine.
Grease a 9”x13” pan, then place a piece of parchment on the bottom and grease that as well.
Pour granola bar mixture into the pan and with damp or greased hands just press it into the pan until it feels firm.
Bake for about 20 minutes or until lightly golden.
Let cool (ideally overnight or for a few hours) and slice into bar sized pieces - I like to wrap them individually in saran wrap and pop them in the freezer, but you can also just crumble up the granola and put it into a jar for eating on top of yogurt or fruit. Yum!