
Baking recipes
Scroll through our posts below to try all sorts of delicious baking recipes from our instagram baking videos. New baking videos are posted the first week of each month on Instagram and Facebook.
To easily find one of our recipes type below:
Bagels...the HOLE-iest bread in town!
Bagels…cream cheese…what better combo is out there!? It’s not very often you get to eat a bagel straight from the oven, at least not in my world, but boy are they delicious! Like most of my bread recipes, this is a whole day affair, but most of that is just waiting around. Perfect for quarantine! You can also start them the day before, then finish them the next day if you are on the ball! Imagine having your friends over for Sunday brunch, just showing off your new found bread skills with freshly made bagels! How impressive! Can’t wait until we can actually have brunch with friends again…one day!

Freshly made BAGELS!
Bagels
Yield: 6 regular sized bagels
Once you get to the boiling stage of the recipe, preheat that oven to 450*F
Sponge:
1 cup room temperature water
1 1/4 teaspoon Yeast (instant or whatever you got!)
1 1/2 cups Flour
Dough:
1 1/2 cups Flour
1 1/2 teaspoon salt
1 Tablespoon Honey (or molasses if you got it!)
Boiling Mixture:
Approximately 2.5 Litres of water
1/4 cup Brown Sugar (or Honey)
1 teaspoon Baking Soda
Egg Wash:
1 egg
pinch of sugar
pinch of salt
Toppings:
I used poppyseeds, but you can use anything! Sesame seeds, dried herbs, everything bagel spice blend!
In the bowl of your mixer, combine the sponge ingredients - 1 cup of water, 1.5 cups of flour and 1 1/4 teaspoon yeast. Then cover this with saran wrap and let it sit for at least 3 hours. This is the “sponge” which is going to grow and build flavour similar to a sourdough bread while it sits.
Your sponge mixture should now looks very bubbly and have a goopy texture, that is perfect! Now dump in the rest of the dough ingredients - 1.5 cups flour, 1.5 teaspoons salt and 1 Tablespoon honey. Mix using the dough hook of your mixer for about 6 minutes. This is a pretty thick dough, so if your mixer sounds strained just pop it out of the bowl and mix it by hand. The finished dough should be soft and not sticky to the touch.
Place your dough ball into a large greased bowl and cover with a towel or saran wrap or a lid. Let it rest at room temperature for 1 hour.
Remove your dough ball and cut it into 6 equal pieces.
Take each piece and roll it into a ball, I like to cup it in my hand and roll it on the counter top to make a nice ball shape.
Now poke your finger through the middle of your dough ball and stretch it out until you have a bagel shape with a hole in the middle that’s about 1.5” wide.
Place the formed bagels onto a parchment lined baking tray that has been lightly dusted with flour.
Once all 6 of your bagels have been formed, cover them with saran wrap and leave them to rest 20-30 minutes at room temperature. If you want the bake these the next day, you can pop these into the fridge overnight and continue with the rest of the recipe tomorrow, just let your bagels sit out at room temperature for about 30 minutes before you boil them so they aren’t super cold.
While your bagels are resting, bring about 2.5 Litres of water to a boil and add 1/4 cup brown sugar and 1 teaspoon of baking soda.
You can also preheat your oven to 450*F at this time!
Now boil your bagels in the water mixture for 20-30 seconds per side, I did mine 2 at a time so the water didn’t cool down too much.
Once boiled place the bagels back onto the parchment lined tray, trying to make sure not to bring too much water onto the tray.
Now the egg wash! Whisk together your egg with a pinch of sugar and salt, you can use a fork for this, just want to break up the egg so we can paint it onto our bagels.
Using a pastry brush if you got it, otherwise your fingers will do, brush the tops and sides of your bagels with the egg wash, then sprinkle them with your toppings, I used poppyseeds but you can also just leave them plain.
Once they are all egg washed pop them into your hot oven and bake until golden brown and hollow sounding when tapped.
Now devour them with cream cheese! Yay!
Angel Food Cake! Popular with Angels AND Devils!
Angel food cake, what a name! I just imagine the Philadelphia Cream Cheese Angel snacking on it while taking a break from her cream cheese bagels. It’s a cake as light , fluffy and white as a cloud! This baby is made without any fat, which means it can be a bit tricky, but I have faith in you! First you make a meringue, then carefully fold in flour and sugar, then once baked you flip it upside down so it doesn’t collapse on itself while it cools! Fun!
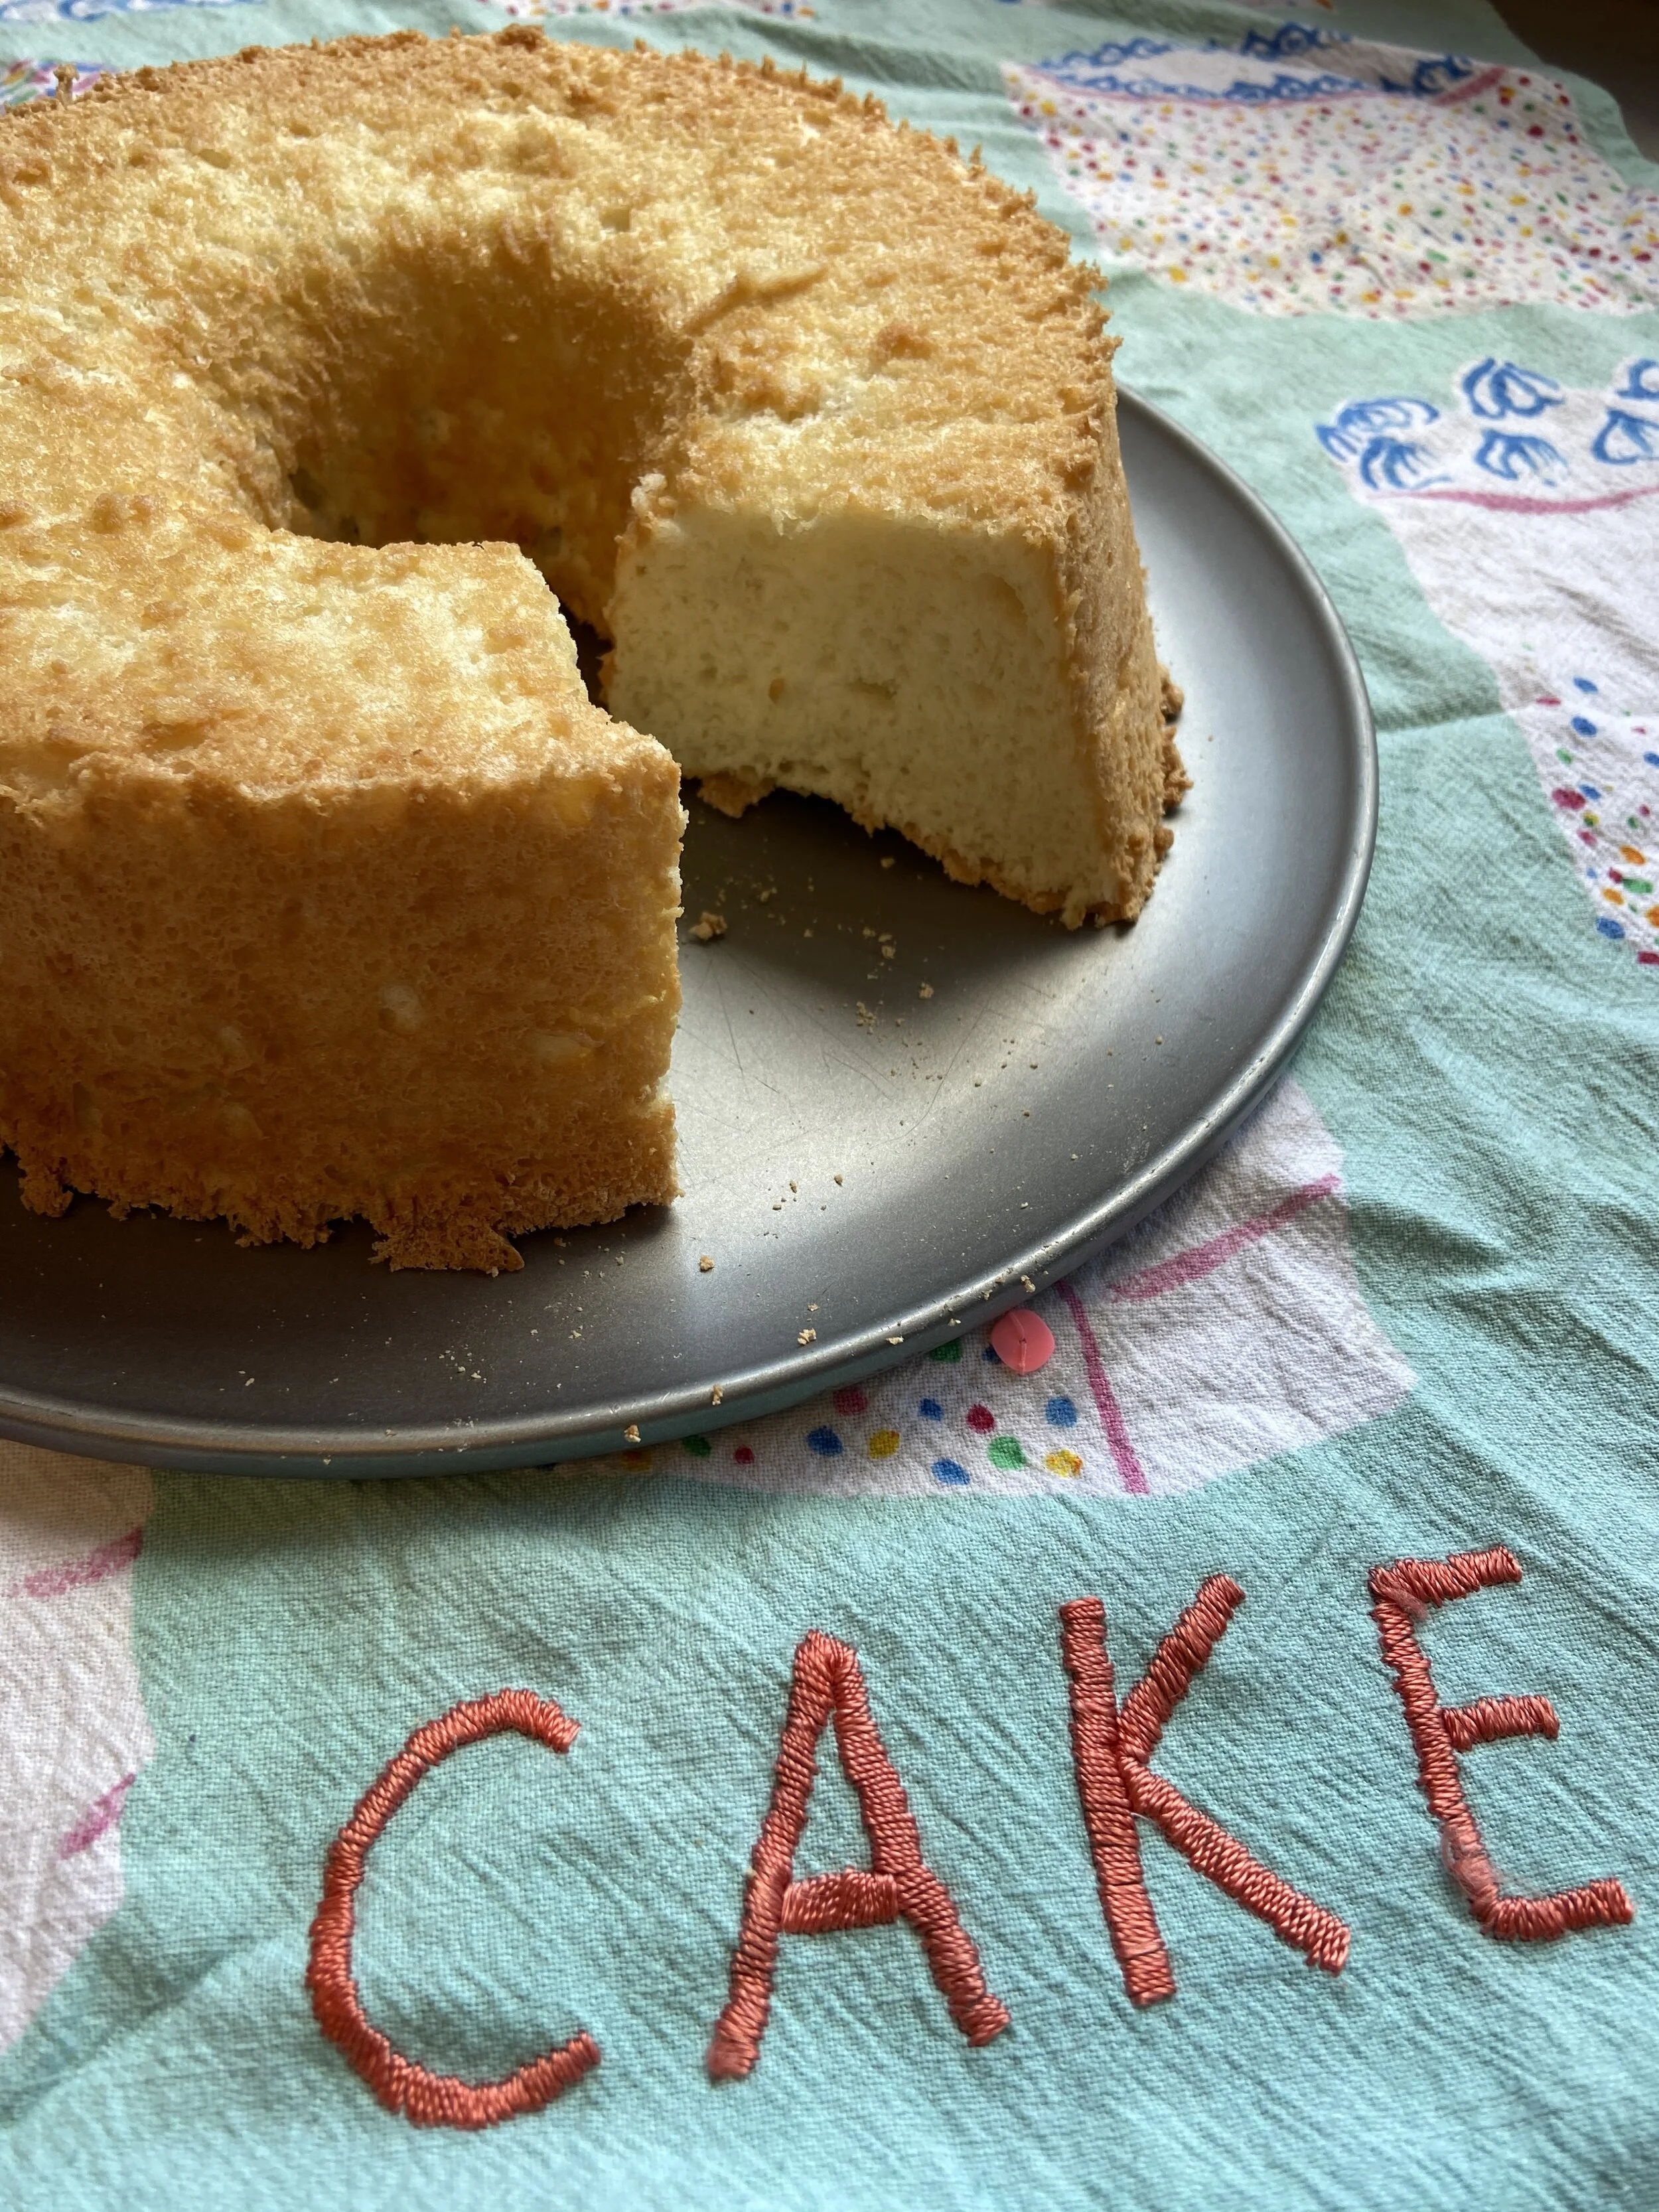
Angel Food Cake!
Angel Food Cake
Yield: 1 x 10” Angel Food Cake Tube Pan (ideally with a removable bottom, but use what you got!)
Preheat your oven to 350*F
1 1/2 cups of Egg Whites, room temperature (I had a carton of pasteurized egg whites to use up, but you can also use fresh egg whites, which would be about 12 egg whites)
1 cup Sugar
1/4 teaspoon Salt
1 teaspoon lemon juice (or vinegar) or if you have it 1/2 teaspoon Cream of Tartar
3/4 cup plus 2 Tablespoons All Purpose Flour
2 Tablespoons Cornstarch
1 1/4 cup Icing Sugar
1 teaspoon Lemon Extract (you can use any flavour here, traditionally it’s almond extract, but vanilla or orange are yummy too!)
Using a sieve, sift together your flour, cornstarch and icing sugar 3 times! Yes, seems excessive but we want those dry ingredients to be light and fluffy! Then set this to the side.
In the bowl of a mixer place your egg whites (make sure the bowl and whisk attachment are super clean and there isn’t any oily residue or else your whites aren’t going to whip). Whip the egg whites with the whisk attachment on medium high speed until they are white, fluffy and starting to look thick.
Now add your lemon juice (or cream of tartar) and salt, and while the machine is whisking on a medium speed very slowly add your 1 cup of regular sugar, don’t dump it in all at once or else it will deflate your egg whites. Basically you want to add a spoonful or two and then once you can’t see it on top of the whites, add another few spoonfuls until it’s all gone.
Once all the sugar is in the whites turn it up to high speed and whisk until you get stiff peaks. You should be able to hold the bowl upside down and the mixture won’t fall out. This is a meringue! Meringue is one of my favourite words.
Remove the bowl from the mixer and add your lemon (or other flavour) extract, and now we are going to add in the flour/icing sugar mixture to the whites by carefully folding it in, in 3-4 additions.
Dump about 1/3 of your flour mixture on top of the meringue and using a rubber spatula,scoop the meringue from the base of the bowl on top of the flour mixture, then continue doing this until it is mostly mixed in, some flour bits will still be showing. Then continue this with the rest of the flour mixture until it has all been incorporated.
At this point your mixture should still be thick and fluffy looking.
Now scoop the batter into your angel food cake tube pan. DO NOT GREASE YOUR PAN! We want a nice, dry, greaseless pan because the batter is going to cling to the sides while it bakes making it nice and light!
Using a butter knife run it through the batter in the pan a few times to knock out any large air bubbles.
Pop your cake into the oven for about 40 minutes or until golden brown and dry looking on top. It should spring back if you touch it with your fingers.
Right when it comes out of the oven FLIP it upside down to cool! Most angel food cake pans have little feet, or a hole in the middle so you can rest it on something and not touch the top edge of the cake.
Once it is cooled, run a knife around the edges, then using the removable bottom from your pan your should be able to push it out and your lovely angel food cake is all ready to be eaten!
I love to eat my angel food cake with whipped cream and berries, but honestly it’s delicious just on it’s own, or if your feeling wild, take a slice, butter both sides, and fry it! Yes, it’s SO good!