
Baking recipes
Scroll through our posts below to try all sorts of delicious baking recipes from our instagram baking videos. New baking videos are posted the first week of each month on Instagram and Facebook.
To easily find one of our recipes type below:
Tiramisu! It's like we're at a fancy Italian Restaurant... when actually we can't leave the house!
Tiramisu! It just sounds delicious! This Italian dessert has layers of coffee soaked ladyfingers (which we made yesterday!), sandwiched with sweet fluffy mascarpone cheese filling, then topped with a sprinkle of cocoa powder! No Italian restaurant required!
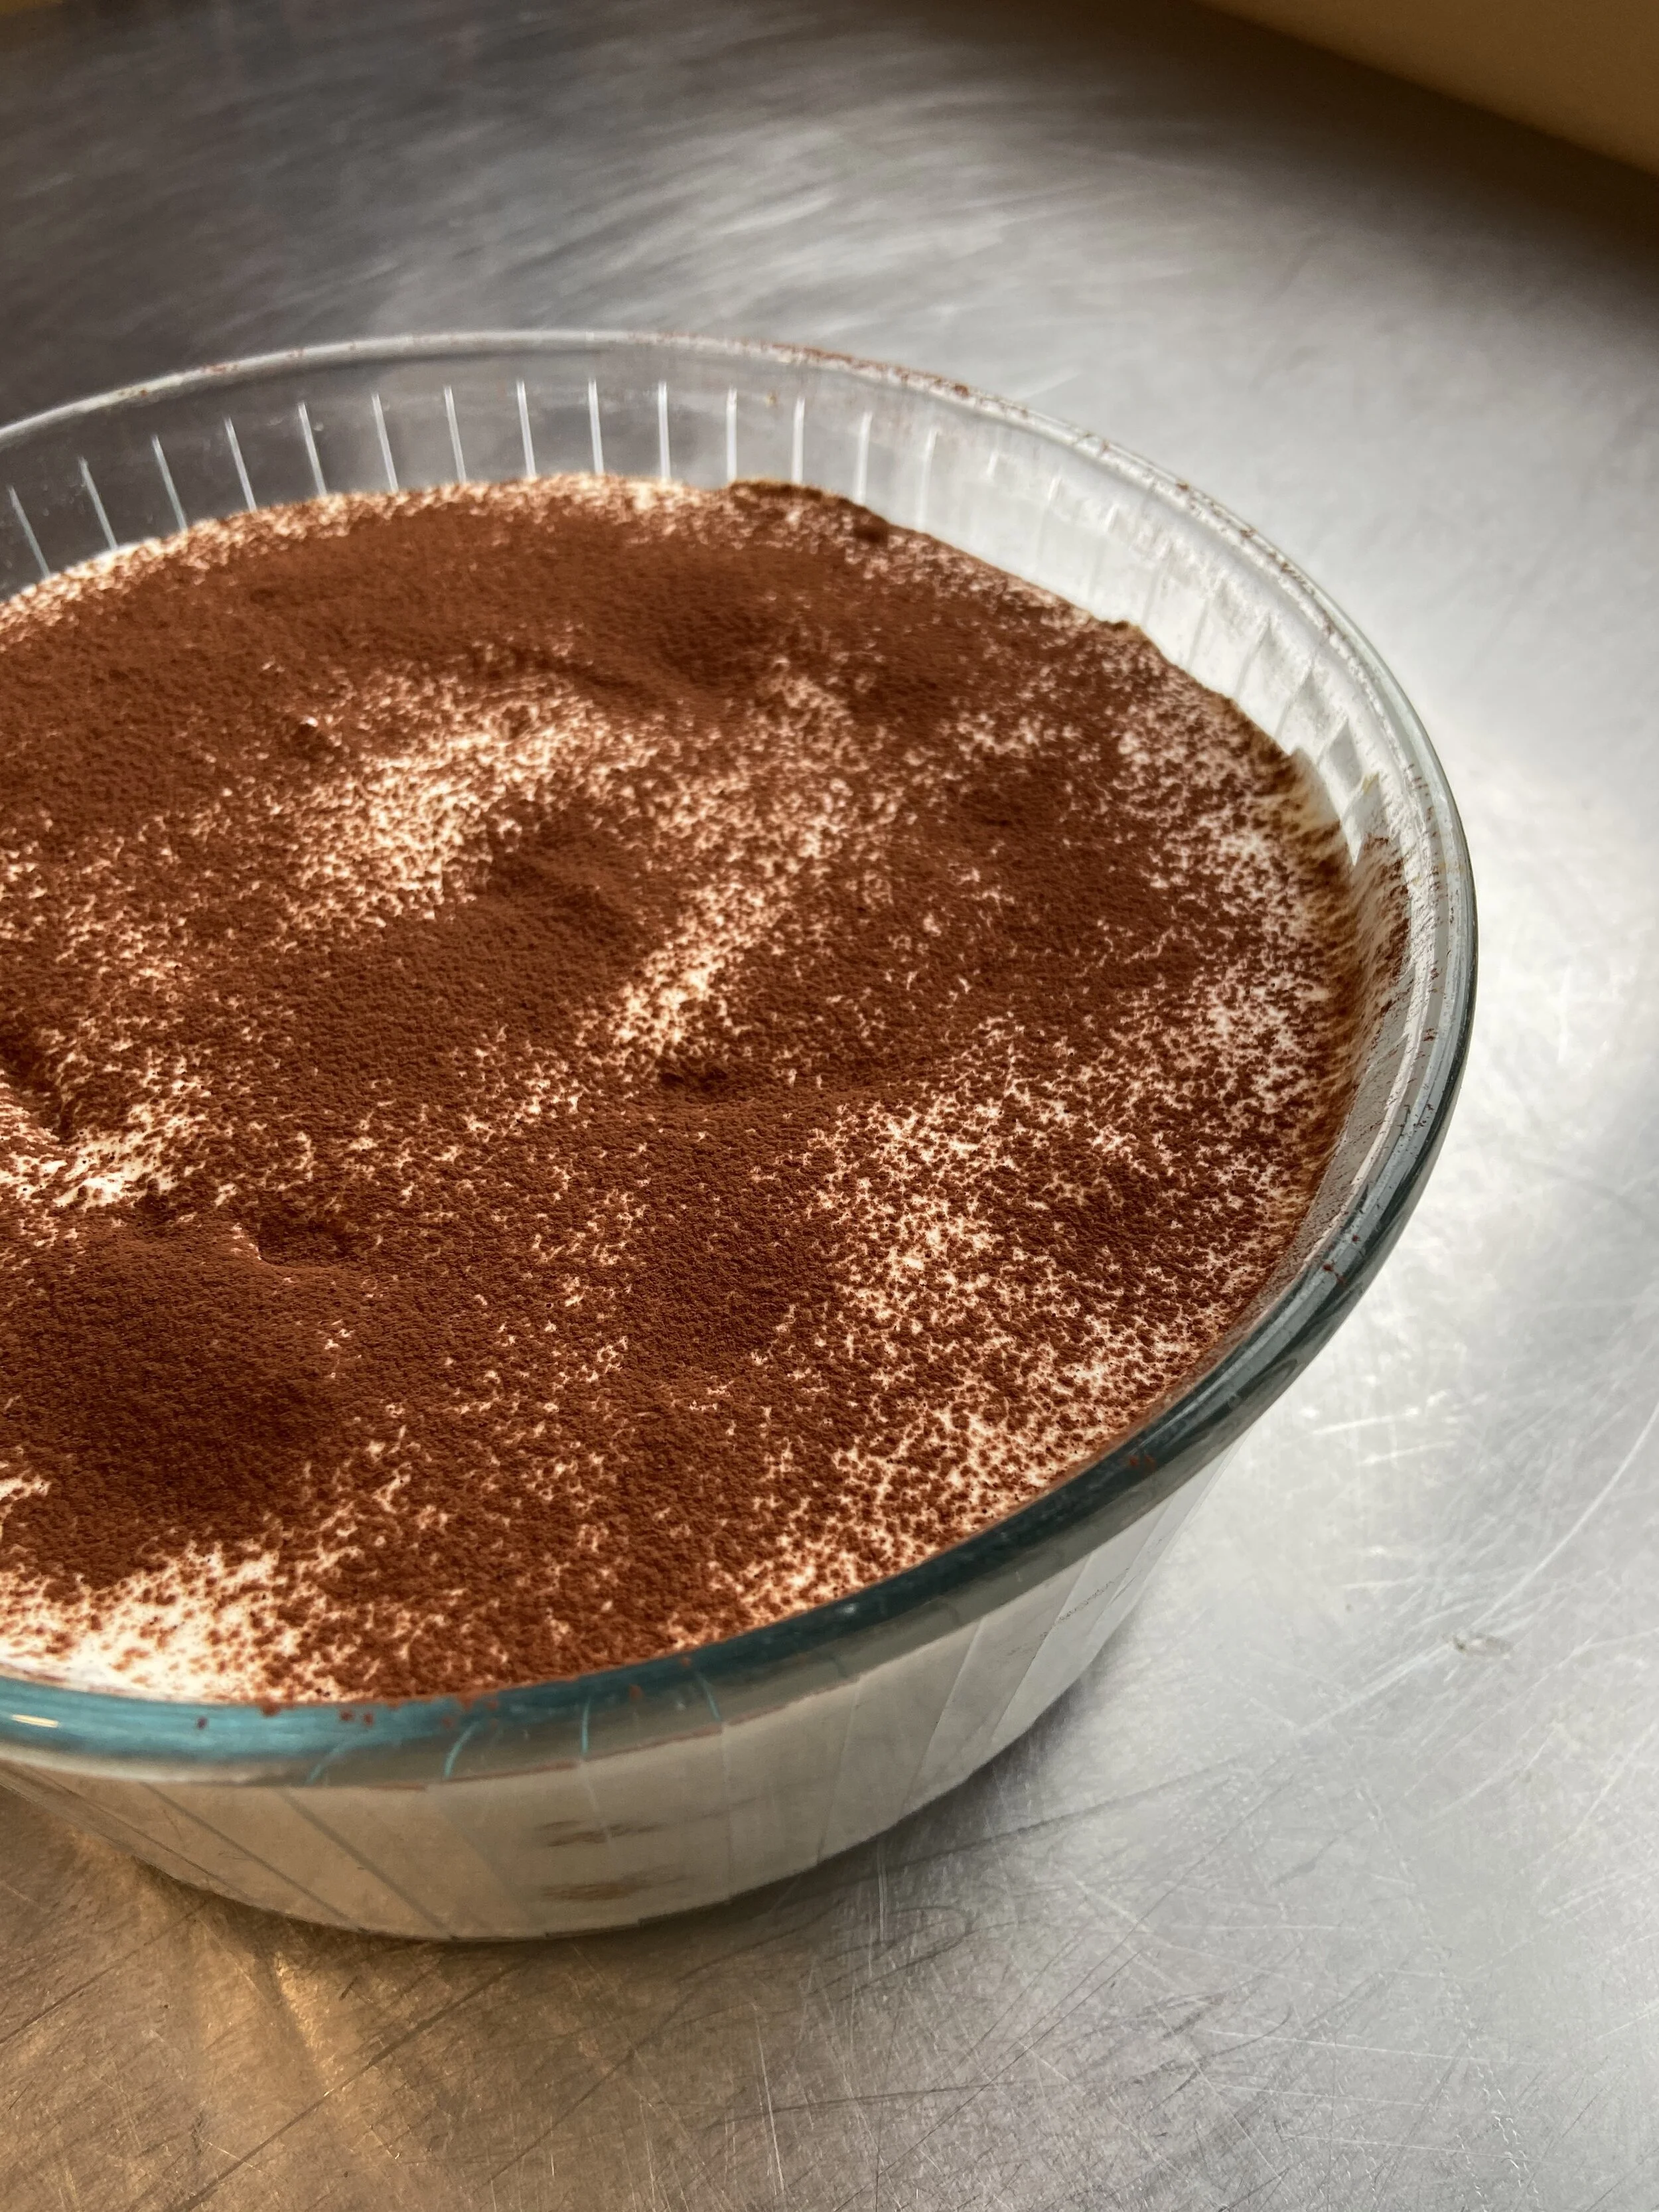
This photo does not capture the deliciousness of this Tiramisu!
Tiramisu
Yield: 1 large serving dish, I believe my glass dish is about 2 litres, but use whatever pan you’ve got, the taller the container, the more layers you will get. You could also make this in a 9”x13” pan
Mascarpone Filling:
1 1/4 cup Whipping cream
4 Egg Yolks
1/2 cup Sugar
2 Tablespoons Frangelico - Traditionally this is made with Marsala wine, but I don’t have any, so use whatever liqueur you got!
pinch of Salt
1 1/4 cup Mascarpone Cheese, softened at room temperature
Ladyfinger Soaking Syrup :
2 cups of coffee
1/4 cup sugar
2 Tablespoons Frangelico (optional)
Approximately 24 ladyfingers (or one batch of the recipe we made yesterday)
Cocoa Powder - for dusting
In a shallow baking dish stir together your ladyfinger soaking syrup ingredients - coffee, sugar, Frangelico. Set this to the side.
In the bowl of your mixer (or by hand) whip the cream to soft peaks. Then leave in fridge until we are ready for it.
Get a pot with water simmering on the stove, we are going to do a water bath! Just an inch or two of water in the bottom of a large pot will be perfect.
Grab a metal bowl the will fit on top of your pot of water and in it place the egg yolks, sugar, Frangelico, and salt. Then stir them together and place it on top of the simmering water pot on the stove. The bowl should not be touching the water, we are just trying to steam the bottom of our bowl and cook the eggs so they are safe to eat.
Constantly stir your egg mixture while it is sitting on the waterbath until the eggs feel warm/hot and when you rub it between your fingers you cannot feel any grains of sugar. Then pour this mixture into the bowl of your mixer and whip on high until cool - it should be super fluffy and marshmallowy looking.
In a large bowl place your softened mascarpone cheese.
With a spatula fold in all of your egg mixture, being as gentle as you can so you don’t knock out too much air.
Now fold in about 1/3 of your whipped cream, again, being gentle!
Then fold in the rest of your cream. Now your filling is complete!
To layer your tiramisu you will start with a layer of ladyfingers. Grab one ladyfinger, dunk it into your coffee syrup on both sides and then place it into the bottom of your serving dish. Continue until you have fully covered the bottom of the pan (mine fit 8 cookies).
Now pour a layer of your mascarpone filling - my container would fit 3 layers of ladyfinger cookies, so I planned to do 3 layers of mascarpone filling, so I poured about 1/3 of the filling on top. but count up your ladyfingers in the base layer and see how many cookies you have for your baking dish and divide the filling evenly.
Continue to layer the soaked ladyfinger cookies, then the mascarpone filling until you use them all up.
Then lightly dust the top of your tiramisu with cocoa powder!
This baby is all finished now, it just needs to sit in the fridge for about 8 hours or overnight to let everything soak into each other.
Yum!
Spinach Dip STUFFED Pretzels!
It’s a soft pretzel…it’s a dip…it’s a SPINACH DIP STUFFED PRETZEL! I love dip! Like everything is better with dip! I could just live off of dip. Some people seem to think it’s inappropriate to just eat straight dip though, so what can one do but stuff it into a delicious soft pretzel! They’re SO good!!!

Pretzels EXPLODING with flavour!
Spinach Dip Stuffed Pretzels
Yield: 4 giant soft pretzels
Once you start shaping your pretzels, preheat your oven to 425*F
Dough:
3/4 cup Milk (or water), warmed
1 Tablespoon Honey
1 1/4 teaspoon Yeast
2 Tablespoons Butter, melted
1 teaspoon Salt
2 cups Flour
Spinach Dip Filling:
1/4 cup Cream Cheese, softened
1 Tablespoon Sour Cream
2 Tablespoons Cooked and drained Spinach (I use the frozen kind, thaw it, and squeeze out the water)
1-2 Tablespoons grated Parmesean
1/4 teaspoon Onion Powder
1/4 teaspoon Garlic Powder
pinch Salt
pinch Pepper
Water Bath:
2 Litres of Water
1/4 cup Baking Soda
Egg Wash:
1 egg
pinch salt
pinch sugar
Coarse Salt for sprinkling on top
In the bowl of your mixer stir together the warm milk and honey. Then sprinkle the yeast on top, and let it sit for about 10 minutes until nice a foamy looking.
Add the rest of the dough ingredients - flour, melted butter, and salt. Using the dough hook on your mixer, knead the dough for about 5-8 minutes, or until the dough is in a ball, not sticking to the sides of the mixer, and no longer sticky to the touch.
Place dough into a greased bowl, cover, and let sit for 1 hour at room temperature.
While the dough is resting, time to make the spinach dip! In a bowl stir together all the ingredients for the spinach dip, taste it, and adjust the seasoning to your taste!
Place the spinach dip into a piping bag, or if you don’t have one, a plastic ziplock bag will work. Then cut the corner/tip of the bag off so you will be able to squeeze out the spinach dip once your dough is ready. Leave at room temperature.
Once dough is rested get your water bath going, you will need a pot with about 2 Litres of water and 1/4 cup baking soda brought to a boil. You can also preheat your oven to 425*F at this time.
Now to roll the dough! Take your dough out of the bowl and cut into 4 equal pieces.
Roll each quarter into a long wormy on the counter, ideally about 18” long.
Now flatten out each wormy with a rolling pin so its about 1.5” wide.
Pipe a line of spinach dip in the middle of your flattened piece of dough from one end to the other.
Now fold the dough around the spinach dip and pinch the two sides together as tightly as possible. Try to make sure no spinach dip squishes out.
Now you should have a long wormy again, but this time it’s filled with spinach dip! Grab both ends, cross them, then place them onto the middle section of the wormy so it looks like a pretzel shape. That is a terrible description, but just look at the photo and make it that shape…or whatever shape your heart desires! Then press the overlapping dough parts together so they somewhat stick. Place onto a lined baking tray that has been lightly floured.
Next you will very gently simmer each pretzel in the baking soda water for about 20-30 seconds per side, then carefully remove and place back onto your baking tray. If your pretzel falls apart don’t worry, just put it back into shape on your baking tray once you remove it from the water.
Whisk together your egg wash - egg, salt, sugar. Then brush it onto your pretzels and sprinkle them with coarse salt.
Pop them into the oven for about 10-15 minutes until golden brown! Yay! Stuffed pretzels and no mall required!
Date Bars, some call them "Matrimonial Slice" but you know commitment issues...we're just DATING!
Sometimes I am a 100 year old women, why? BECAUSE I LOVE DATE BARS! They are buttery, soft, crunchy, cinnamon-y, and sweet! Plus, they are made of dried fruit and oats, so as far as I’m concerned they are a breakfast food. If you aren’t into the dates, you can also replace the date filling with the apple pie filling we made for our turnovers a few days ago, just double the apple filling recipe so you use 2 apples!

Date Bars for when your not allowed to go on dates to bars.
Date Bars
Yield: one 8”x8” pan or something of a similar size
Preheat your oven to 350*F
Date Filling:
2 1/2 cups roughly chopping Dried Dates (about one pound)
1 cup Water
1 Tablespoon Lemon Juice
1/2 teaspoon Baking Soda
1/4 teaspoon Salt
1 Tablespoon Butter
1 Tablespoon Grand Marnier (optional)
Streusel:
3/4 cup Butter, soft
1 cup Brown Sugar
1 1/4 cup Flour
1 1/4 cup Oats
1/2 teaspoon Salt
1/4 teaspoon Baking Powder
1 teaspoon Cinnamon
In a small pot over medium heat cook your dates, water, lemon juice, baking soda, salt and butter until it thickens and forms a puree type mixture. Remove from heat. (If your don’t want any larger date chunks you can puree this mixture in a food processor, but I like the texture so I just leave it as is!)
Add the Grand Marnier if using, then set to the side.
In a large bowl combine all the Streusel ingredients and rub them together with your hands until they are combined.
In a greased and lined 8”x8” pan pour about 2/3 of your streusel mixture and press into the bottom of the pan to form a crust.
Pour all of your date filling on top of the base crust and smooth it out evenly making sure to cover the entire base.
Now take the last 1/3 of streusel and crumble it on top of the date layer.
Bake in a preheated 350*F oven for about 25-35 minutes or until just starting to turn golden brown on the edges.
Let cool, then slice and eat! Or add to your tray of dainties if you are having a fancy team party like I wish I was having right now!
Lemon Cranberry Scones!
Did you see Julie Van Rosendaal and I did a live instagram! What!!! She’s only my idol, no big deal! Just kidding SUPER BIG DEAL! How exciting!!! Anyways Julie made biscuits and I made these lemon cranberry scones!

Lemony and delicious!
Lemon Cranberry Scones
Yield: 6 scones
Preheat your oven to 350*F
1/2 teaspoon Salt
1 1/2 cups Flour
1/4 cup Sugar
1/4 teaspoon Baking Soda
1 1/4 teaspoon Baking Powder
1/2 cup Butter, cold, cubed
1/2 cup Buttermilk
1 Egg
1/2 teaspoon lemon extract (or the zest of 1 lemon)
1/4 cup Dried Cranberries
Glaze:
1 Tablespoon Lemon Juice
Enough Icing Sugar to thicken to a drizzling consistency ~1/4-1/2 cup
In a large bowl stir together your dry ingredients - salt, flour, sugar, baking soda, baking powder.
Using your fingers pinch and rub in the butter until the mixture looks sandy but still has some pea sized chunks of butter.
Now pour in your liquid ingredients - buttermilk, egg, lemon extract, and you can also add in the cranberries at this time too. Stir just until combined.
On a floured surface shape your dough into a rough circle about 1” thick, then using a knife cut the circle like a pie, into 6 pieces.
Place onto a lined baking tray and brush the tops with a little buttermilk and sprinkle with sugar.
Bake for about 15-20 minutes or until lightly browned.
While baking, mix together your glaze, lemon juice and icing sugar, just add enough icing sugar until you get a thin paste.
Once your scones come out of the oven, drizzle the glaze on them while hot.
Now eat! Yay!!
Bagels...the HOLE-iest bread in town!
Bagels…cream cheese…what better combo is out there!? It’s not very often you get to eat a bagel straight from the oven, at least not in my world, but boy are they delicious! Like most of my bread recipes, this is a whole day affair, but most of that is just waiting around. Perfect for quarantine! You can also start them the day before, then finish them the next day if you are on the ball! Imagine having your friends over for Sunday brunch, just showing off your new found bread skills with freshly made bagels! How impressive! Can’t wait until we can actually have brunch with friends again…one day!

Freshly made BAGELS!
Bagels
Yield: 6 regular sized bagels
Once you get to the boiling stage of the recipe, preheat that oven to 450*F
Sponge:
1 cup room temperature water
1 1/4 teaspoon Yeast (instant or whatever you got!)
1 1/2 cups Flour
Dough:
1 1/2 cups Flour
1 1/2 teaspoon salt
1 Tablespoon Honey (or molasses if you got it!)
Boiling Mixture:
Approximately 2.5 Litres of water
1/4 cup Brown Sugar (or Honey)
1 teaspoon Baking Soda
Egg Wash:
1 egg
pinch of sugar
pinch of salt
Toppings:
I used poppyseeds, but you can use anything! Sesame seeds, dried herbs, everything bagel spice blend!
In the bowl of your mixer, combine the sponge ingredients - 1 cup of water, 1.5 cups of flour and 1 1/4 teaspoon yeast. Then cover this with saran wrap and let it sit for at least 3 hours. This is the “sponge” which is going to grow and build flavour similar to a sourdough bread while it sits.
Your sponge mixture should now looks very bubbly and have a goopy texture, that is perfect! Now dump in the rest of the dough ingredients - 1.5 cups flour, 1.5 teaspoons salt and 1 Tablespoon honey. Mix using the dough hook of your mixer for about 6 minutes. This is a pretty thick dough, so if your mixer sounds strained just pop it out of the bowl and mix it by hand. The finished dough should be soft and not sticky to the touch.
Place your dough ball into a large greased bowl and cover with a towel or saran wrap or a lid. Let it rest at room temperature for 1 hour.
Remove your dough ball and cut it into 6 equal pieces.
Take each piece and roll it into a ball, I like to cup it in my hand and roll it on the counter top to make a nice ball shape.
Now poke your finger through the middle of your dough ball and stretch it out until you have a bagel shape with a hole in the middle that’s about 1.5” wide.
Place the formed bagels onto a parchment lined baking tray that has been lightly dusted with flour.
Once all 6 of your bagels have been formed, cover them with saran wrap and leave them to rest 20-30 minutes at room temperature. If you want the bake these the next day, you can pop these into the fridge overnight and continue with the rest of the recipe tomorrow, just let your bagels sit out at room temperature for about 30 minutes before you boil them so they aren’t super cold.
While your bagels are resting, bring about 2.5 Litres of water to a boil and add 1/4 cup brown sugar and 1 teaspoon of baking soda.
You can also preheat your oven to 450*F at this time!
Now boil your bagels in the water mixture for 20-30 seconds per side, I did mine 2 at a time so the water didn’t cool down too much.
Once boiled place the bagels back onto the parchment lined tray, trying to make sure not to bring too much water onto the tray.
Now the egg wash! Whisk together your egg with a pinch of sugar and salt, you can use a fork for this, just want to break up the egg so we can paint it onto our bagels.
Using a pastry brush if you got it, otherwise your fingers will do, brush the tops and sides of your bagels with the egg wash, then sprinkle them with your toppings, I used poppyseeds but you can also just leave them plain.
Once they are all egg washed pop them into your hot oven and bake until golden brown and hollow sounding when tapped.
Now devour them with cream cheese! Yay!
Angel Food Cake! Popular with Angels AND Devils!
Angel food cake, what a name! I just imagine the Philadelphia Cream Cheese Angel snacking on it while taking a break from her cream cheese bagels. It’s a cake as light , fluffy and white as a cloud! This baby is made without any fat, which means it can be a bit tricky, but I have faith in you! First you make a meringue, then carefully fold in flour and sugar, then once baked you flip it upside down so it doesn’t collapse on itself while it cools! Fun!
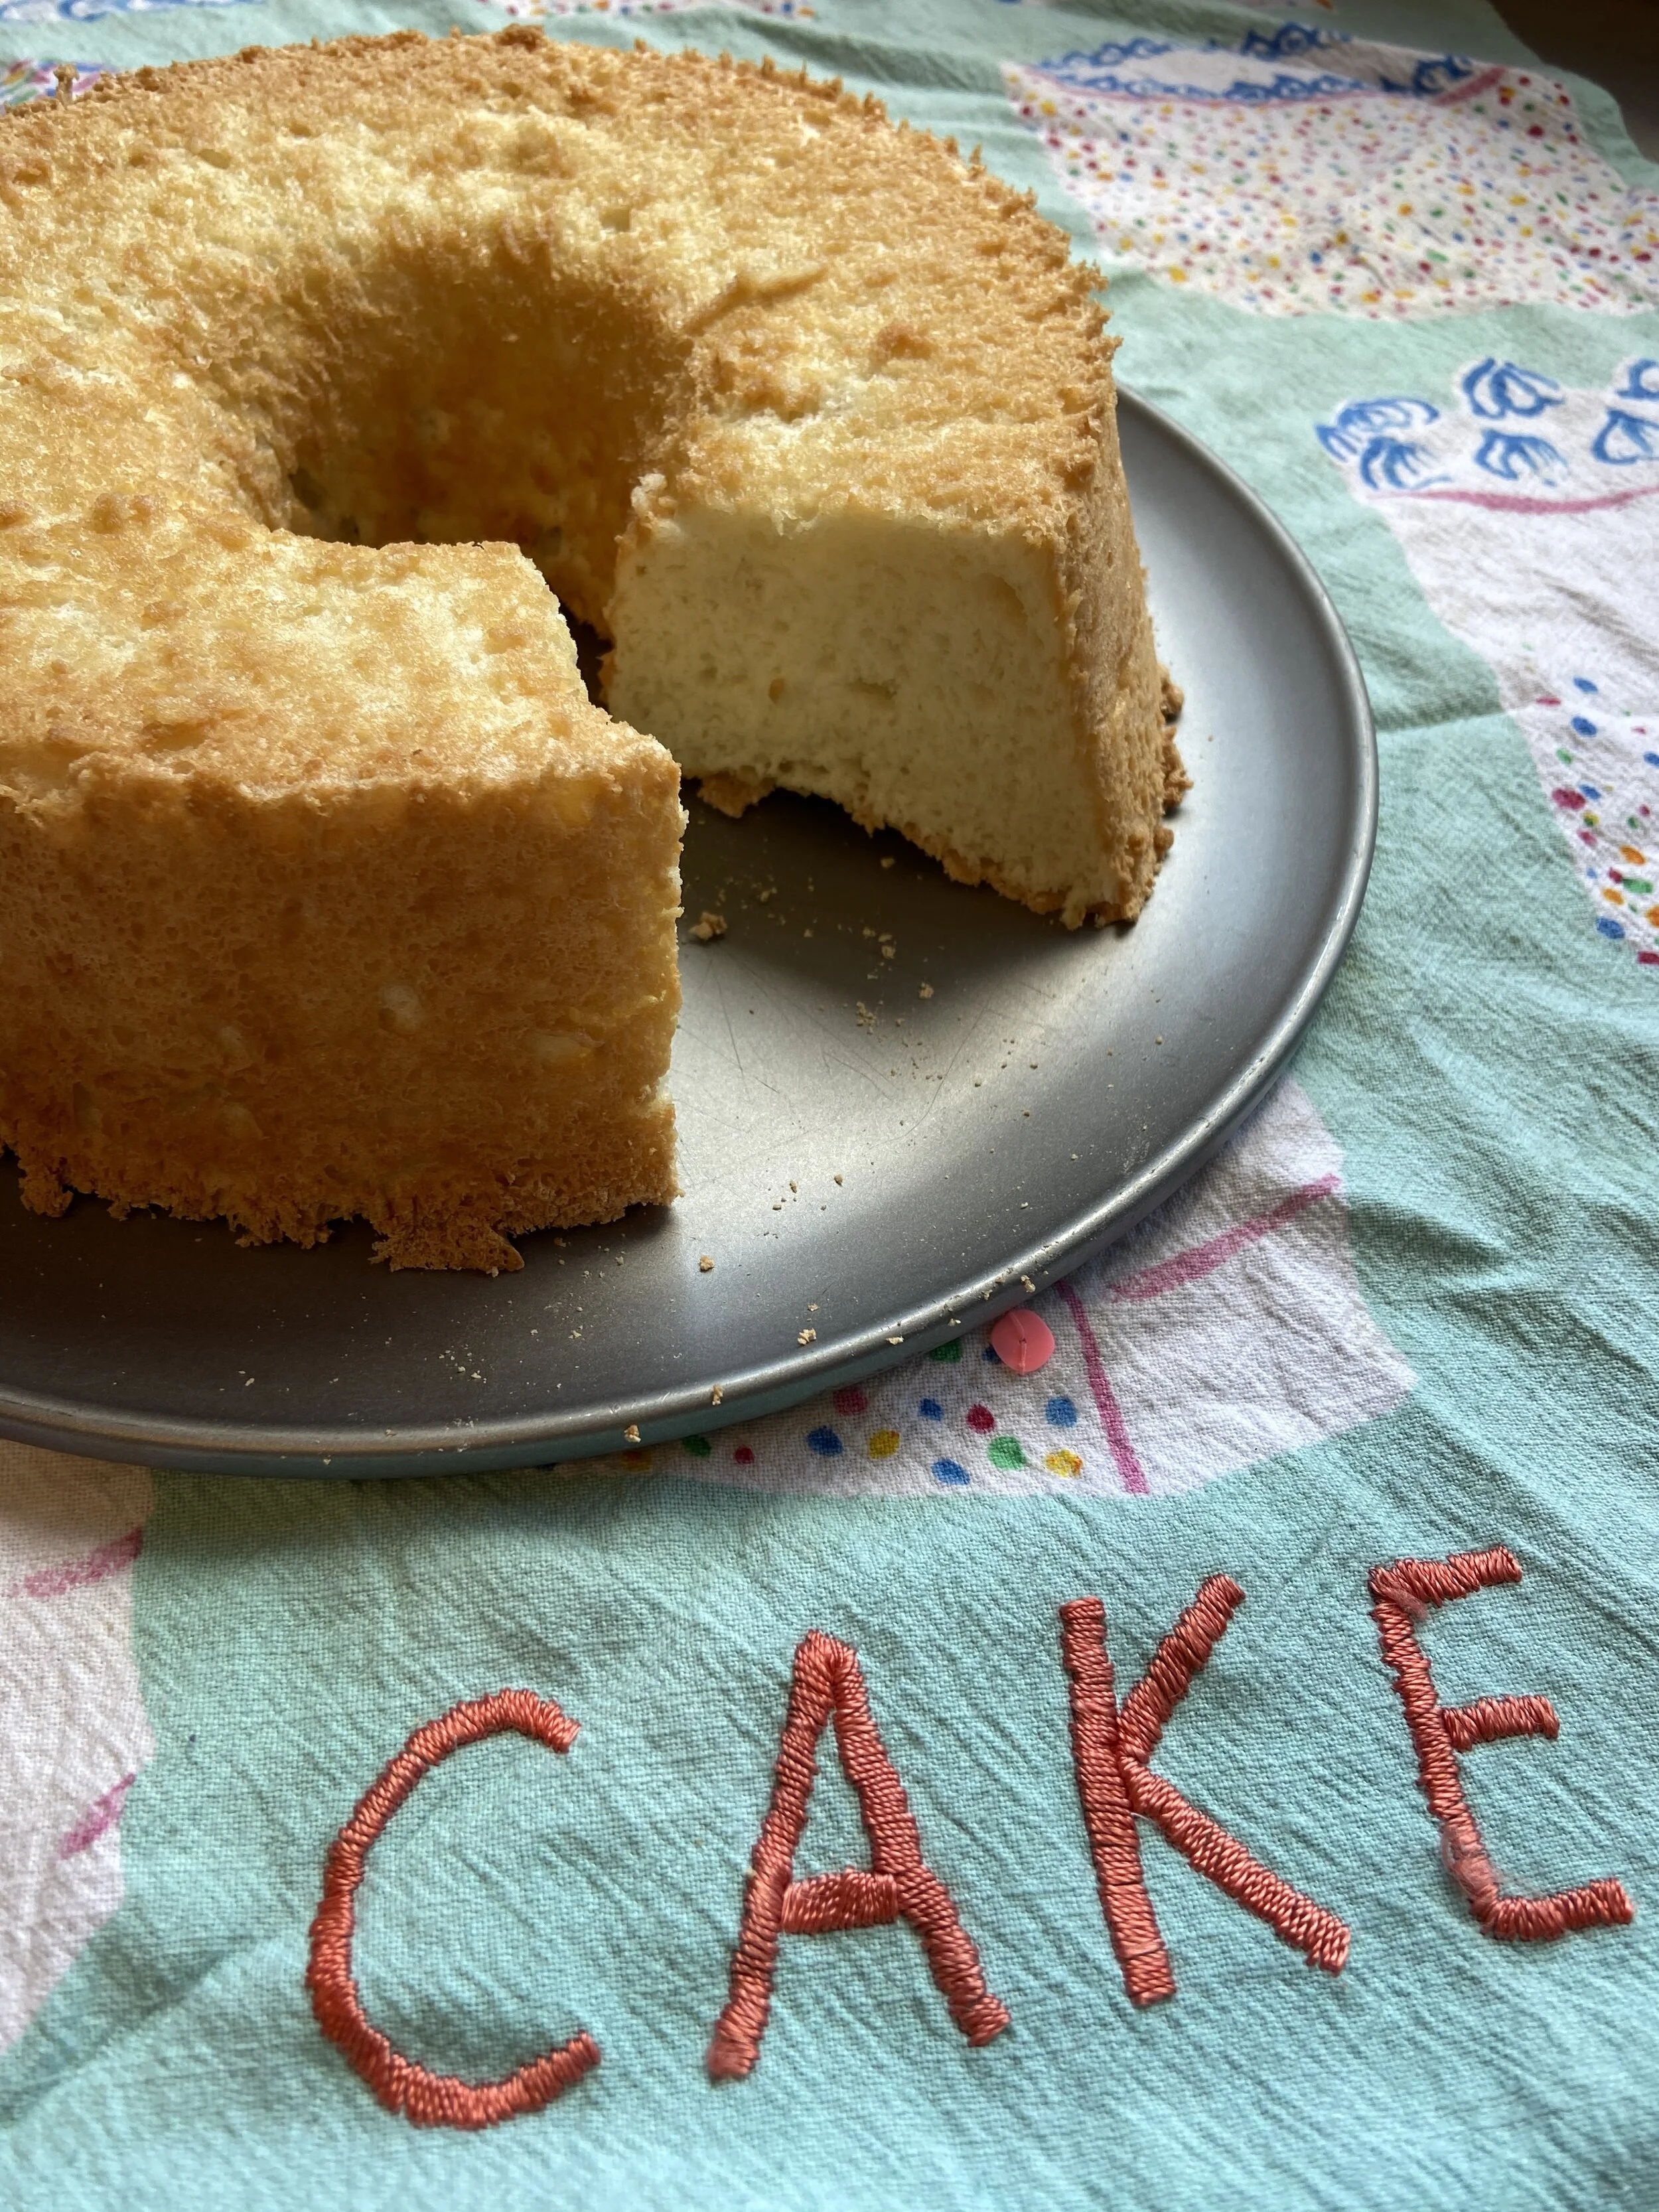
Angel Food Cake!
Angel Food Cake
Yield: 1 x 10” Angel Food Cake Tube Pan (ideally with a removable bottom, but use what you got!)
Preheat your oven to 350*F
1 1/2 cups of Egg Whites, room temperature (I had a carton of pasteurized egg whites to use up, but you can also use fresh egg whites, which would be about 12 egg whites)
1 cup Sugar
1/4 teaspoon Salt
1 teaspoon lemon juice (or vinegar) or if you have it 1/2 teaspoon Cream of Tartar
3/4 cup plus 2 Tablespoons All Purpose Flour
2 Tablespoons Cornstarch
1 1/4 cup Icing Sugar
1 teaspoon Lemon Extract (you can use any flavour here, traditionally it’s almond extract, but vanilla or orange are yummy too!)
Using a sieve, sift together your flour, cornstarch and icing sugar 3 times! Yes, seems excessive but we want those dry ingredients to be light and fluffy! Then set this to the side.
In the bowl of a mixer place your egg whites (make sure the bowl and whisk attachment are super clean and there isn’t any oily residue or else your whites aren’t going to whip). Whip the egg whites with the whisk attachment on medium high speed until they are white, fluffy and starting to look thick.
Now add your lemon juice (or cream of tartar) and salt, and while the machine is whisking on a medium speed very slowly add your 1 cup of regular sugar, don’t dump it in all at once or else it will deflate your egg whites. Basically you want to add a spoonful or two and then once you can’t see it on top of the whites, add another few spoonfuls until it’s all gone.
Once all the sugar is in the whites turn it up to high speed and whisk until you get stiff peaks. You should be able to hold the bowl upside down and the mixture won’t fall out. This is a meringue! Meringue is one of my favourite words.
Remove the bowl from the mixer and add your lemon (or other flavour) extract, and now we are going to add in the flour/icing sugar mixture to the whites by carefully folding it in, in 3-4 additions.
Dump about 1/3 of your flour mixture on top of the meringue and using a rubber spatula,scoop the meringue from the base of the bowl on top of the flour mixture, then continue doing this until it is mostly mixed in, some flour bits will still be showing. Then continue this with the rest of the flour mixture until it has all been incorporated.
At this point your mixture should still be thick and fluffy looking.
Now scoop the batter into your angel food cake tube pan. DO NOT GREASE YOUR PAN! We want a nice, dry, greaseless pan because the batter is going to cling to the sides while it bakes making it nice and light!
Using a butter knife run it through the batter in the pan a few times to knock out any large air bubbles.
Pop your cake into the oven for about 40 minutes or until golden brown and dry looking on top. It should spring back if you touch it with your fingers.
Right when it comes out of the oven FLIP it upside down to cool! Most angel food cake pans have little feet, or a hole in the middle so you can rest it on something and not touch the top edge of the cake.
Once it is cooled, run a knife around the edges, then using the removable bottom from your pan your should be able to push it out and your lovely angel food cake is all ready to be eaten!
I love to eat my angel food cake with whipped cream and berries, but honestly it’s delicious just on it’s own, or if your feeling wild, take a slice, butter both sides, and fry it! Yes, it’s SO good!
Cinnamon Streusel Banana Bread because we all have ugly bananas in our freezer!
I love bananas! Not just as a fruit, but I think they are SO cute! I literally have a banana change purse, banana leaf wallpaper and my phone screen is bananas, they are happy, yellow and adorable! One might say I’m BANANAS for bananas! Anyways, last week was pi day, which meant making mucho banana cream pies but now I am left with lots of bananas that didn’t get used up, so what better use than banana bread! If you don’t have a pile of blackening bananas on your counter like me, you probably have a few in the freezer, where all bananas go to die, so lets use them up!

Cinnamon Streusel Banana Bread - a gift from the baking gods!
Cinnamon Streusel Banana Bread
Yield: 1 loaf pan 9”x4” or whatever pan you want to use!
Preheat your oven to 350*F
4 Bananas (or 3 if they are big boys!) - ideally blackening ones or ones from the freezer as they are full of flavour!
3/4 cup Sugar
1/2 cup Brown Sugar
1/2 cup Vegetable Oil - I used canola but anything light on flavour should be good
2 Eggs
1/2 cup Buttermilk (or sour cream or yogurt or 1/2 cup milk plus 1/2 teaspoon vinegar)
1 teaspoon Vanilla Extract (optional)
1 teaspoon Baking Soda
1 teaspoon Salt
1 teaspoon Cinnamon
2 cups Flour
Streusel Topping:
1/4 cup Butter, softened
1 cup Brown Sugar
1 Tablespoon Cinnamon
1/4 cup Oats
in a large bowl smash your bananas until they are liquidy, I use a fork, but you can also use a potato masher if that’s easier for ya!
To the bananas add both the regular and brown sugar, you can also add the cinnamon, salt, and baking soda at this point. Stir to combine.
Now pour in your liquid ingredients, buttermilk, oil, eggs and vanilla. Stir to combine.
Now add all your flour and stir together. Don’t overmix the batter here, it’s ok if there are a few lumpy bits.
In a separate bowl place all the ingredients for your streusel topping - butter, brown sugar, cinnamon, and oats.
Using your hands smoosh together the streusel ingredients until the butter has been incorporated into the sugar.
In a greased and lined loaf pan place about 1/3 of the batter and spread to cover the base of the pan, now grab a handful of the streusel topping and spread it over top, then repeat this two more times until you use up all the batter and streusel topping, making sure to have a nice layer of streusel topping to place on top of the loaf.
Bake in a preheated 350F oven for about 45-60 minutes, or until a toothpick stabbed into it comes out clean. If your banana bread seems to be browning too quickly, turn the heat down to 325*F. If you don’t use a loaf pan be sure to adjust your baking time, the thinner your batter is, the less time it’s going to take.
Let cool then you are ready to slice and eat! Yay!!!!