
Baking recipes
Scroll through our posts below to try all sorts of delicious baking recipes from our instagram baking videos. New baking videos are posted the first week of each month on Instagram and Facebook.
To easily find one of our recipes type below:
Ciabatta - it takes a day...but it's worth it! I swear!
Ciabatta is my favourite bread! I have paid a ridiculous amount of money for a single loaf of ciabatta (and I would happily do it again!), but guess what, you can make it at home for pennies! Literally! My food costing comes in around $0.30 whaaaaaatttt! Amazing! It is a labour of love though because it takes about 24 hours to make, but what else are we doing, it’s quarantine! If I am going to have 24 hours to dedicate to a bread it’s now! Yay! This delicious bread starts the day before with a pre-ferment called a biga. A biga is basically a lump of firm dough, I think in theory it was a lump of the dough from your bread baking the day before, but obviously if I made dough it would all be eaten that day. That lump of dough then sits for ideally about 18 hours at room temperature so it can gain lots of flavour and grow some natural yeasts, giving it that sourdough tang without needing to worry about a sourdough starter, because that takes like a week and I can’t be bothered!

Ciabatta Bread before going into my belly!
Ciabatta
Yield: 1 loaf (approximately 10”x4” rectangle)
Biga:
2/3 cup Flour
1/4 cup Warm Water
pinch of Instant Yeast
Final Dough:
1 1/4 cup Flour
1/2 teaspoon Instant Yeast
2/3 cup Warm Water
1 teaspoon Salt
Biga that has sat for 12-18 hours at room temperature
In your mixer with a dough hook combine your Biga ingredients - 2/3 cup flour, 1/4 cup warm water and pinch of yeast. Mix for 3 minutes on a low speed.
You should have a little dough ball, this is your Biga! Place your biga in a greased bowl with a lid/saran wrap and leave at room temperature for 12-18 hours. It should become bubbly and rise.
Once your Biga is ready to go, place it into your mixer along with all of the other ingredients for the final dough. Mix with a dough hook for 4 minutes. This dough is going to look very sticky and goopy, that is perfect!
Place the dough into a greased bowl or pan that has a lid and let sit and proof at room temperature for about 1 hour or until doubled.
Once your dough it ready you will fold your dough ball in half 4 times, I like to use a rectangle pan instead of a bowl when I make ciabatta because it has 4 sides, and i can turn the pan for each fold so I make sure to do this 4 times. Grab the edge of the dough and fold it in half, then turn the pan or bowl 90 degrees and repeat, do this until you get back to where you started and your 4 folds will be complete! Now put the lid on and let sit at room temperature for 1 hour.
Now that your dough has sat, you will repeat the 4 folds like we did earlier. Then place a lid on and let it sit at room temperature for 30 minutes.
Our dough is now ready to shape. Grab a large baking tray and dust it fairly heavily with flour.
Place your dough gently onto the tray and gently stretch the dough into an approximate 10”x4” rectangle shape. Try not to squish the dough, we don’t want to collapse too much of the volume.
Now heavily dust the top of the ciabatta bread with flour, then drape a clean tea towel on top and let it sit at room temperature for 30 minutes.
While the dough is resting, heat your oven up to 450*F and place a clean metal tray on the bottom rack of your oven, this needs to be hot when we bake our bread.
Once your dough is ready to go, place it into the hot oven, on the rack above the one with the hot tray, then grab 1-1 1/2 cups of water and carefully pour it onto the metal pan that is on the bottom rack and its going to SIZZLE and create STEAM! Quickly close the oven to capture all the steam and bake your ciabatta for about 20 minutes. DON’T OPEN THE OVEN! If you take a peak into the oven it’s going to release the steam we just created and we want to keep that steam in there to allow our dough to grow and expand in the oven before it crusts up.
Your ciabatta will be done when it is golden brown and when you tap it with your finger it should sound hollow.
Place your cooked loaf onto a wire rack to cool (this helps steam from forming under your loaf and giving you a soggy bottom!)
Now eat your AMAZING ciabatta bread! I’m eating mine now! mmmm
Strawberry Cheesecake Babka!
Remember that cinnamon swirl bread you would get as a treat when you were little? Well imagine that, but a million times more delicious! You can fill your babka with all sorts of different fillings, if you want to make it with a cinnamon bun filling you can get that cinnamon swirl bread flavour, the most common flavour is chocolate, but today we are making STRAWBERRY CHEESECAKE! For that we are filling a rich brioche dough with a cheesecake layer, as well as strawberry jam.

So fluffy and buttery!
Strawberry Cheesecake Babka
Yield: 1 loaf (8”x4” loaf pan or an 8” round cake pan)
Once dough is on it’s final proof in the loaf pan, Preheat the oven to 350*F
Brioche Dough:
2 1/4 cup Flour
2 teaspoons Yeast
3 Tablespoons Sugar
1 teaspoon Salt
3 Eggs, room temperature
1/3 cup Milk, warm
2/3 cup Butter, soft
Cheesecake Filling:
1/2 cup Cream Cheese (4 oz.), soft
pinch Salt
2 Tablespoons Sugar
1 Tablespoon Sour cream
1/4-1/2 cup Strawberry jam (or whatever flavour you like!)
Glaze (optional):
1 Tablespoon Apricot Jam
2 teaspoons Water
In the bowl of your mixer stir together the brioche dry ingredients - flour, yeast, salt and sugar
Add the eggs and milk to your dry ingredients, then mix with a dough hook for about 6 minutes, or until the dough no longer sticks to the sides of the bowl, and is in a ball around the hook.
Now with the mixer running, slowly add the soft butter about 1 tablespoon at a time. toss in one small piece of butter, then let it knead into the dough before adding another piece. This will take about 10 minutes to do, to get the butter incorporated, ending with a sticky soft dough.
Plop the dough into a greased bowl and let it proof at room temperature for 1-2 hours or until doubled.
While the dough is proofing, stir together all your cheesecake filling ingredients except for the jam. Then set to the side at room temperature.
Once dough has relaxed pop it onto a floured counter and roll into a large rectangle about 10”x15”
Smear your cheesecake filling on top of the rectangle leaving about 1” of dough without filling on the top edge.
Next smear on your strawberry jam on top of the cheesecake layer.
Now roll your dough up like a cinnamon bun. Once you have rolled up the entire dough, pinch together the top edge.
Using a large sharp knife slice the log right down the middle so you end up with two long wormies of dough.
Now grab one log and lift it over the other log and then continue until you have a “rope” sort of braid looking log of dough. Try to keep the cut side of each log facing the top so we can see all the exposed layers from the top. Pinch together the ends.
Now place your dough into a greased loaf or cake pan. This is a little messy, but just do your best to get it all in there!
Cover with saran wrap and let your dough proof at room temperature for 1-2 hours or until doubled.
Preheat your oven to 350*F
Once you bread is proofed, remove the saran wrap and pop into the oven for 40-60 minutes, or until golden brown and a toothpick comes out clean when stabbed into it.
When your loaf comes out of the oven you can paint the top with a little bit of apricot jam thinned out with warm water. This isn’t necessary, but add a little shine!
Now enjoy!
Florentine Cookies!
Today is April fools day, but these crunchy caramelized cookies are no joke! They are dangerously thin and crispy! You can dip them in chocolate or sandwich two together with nutella if you are feeling extra decedent, but I just like to eat them straight up…by the dozen!
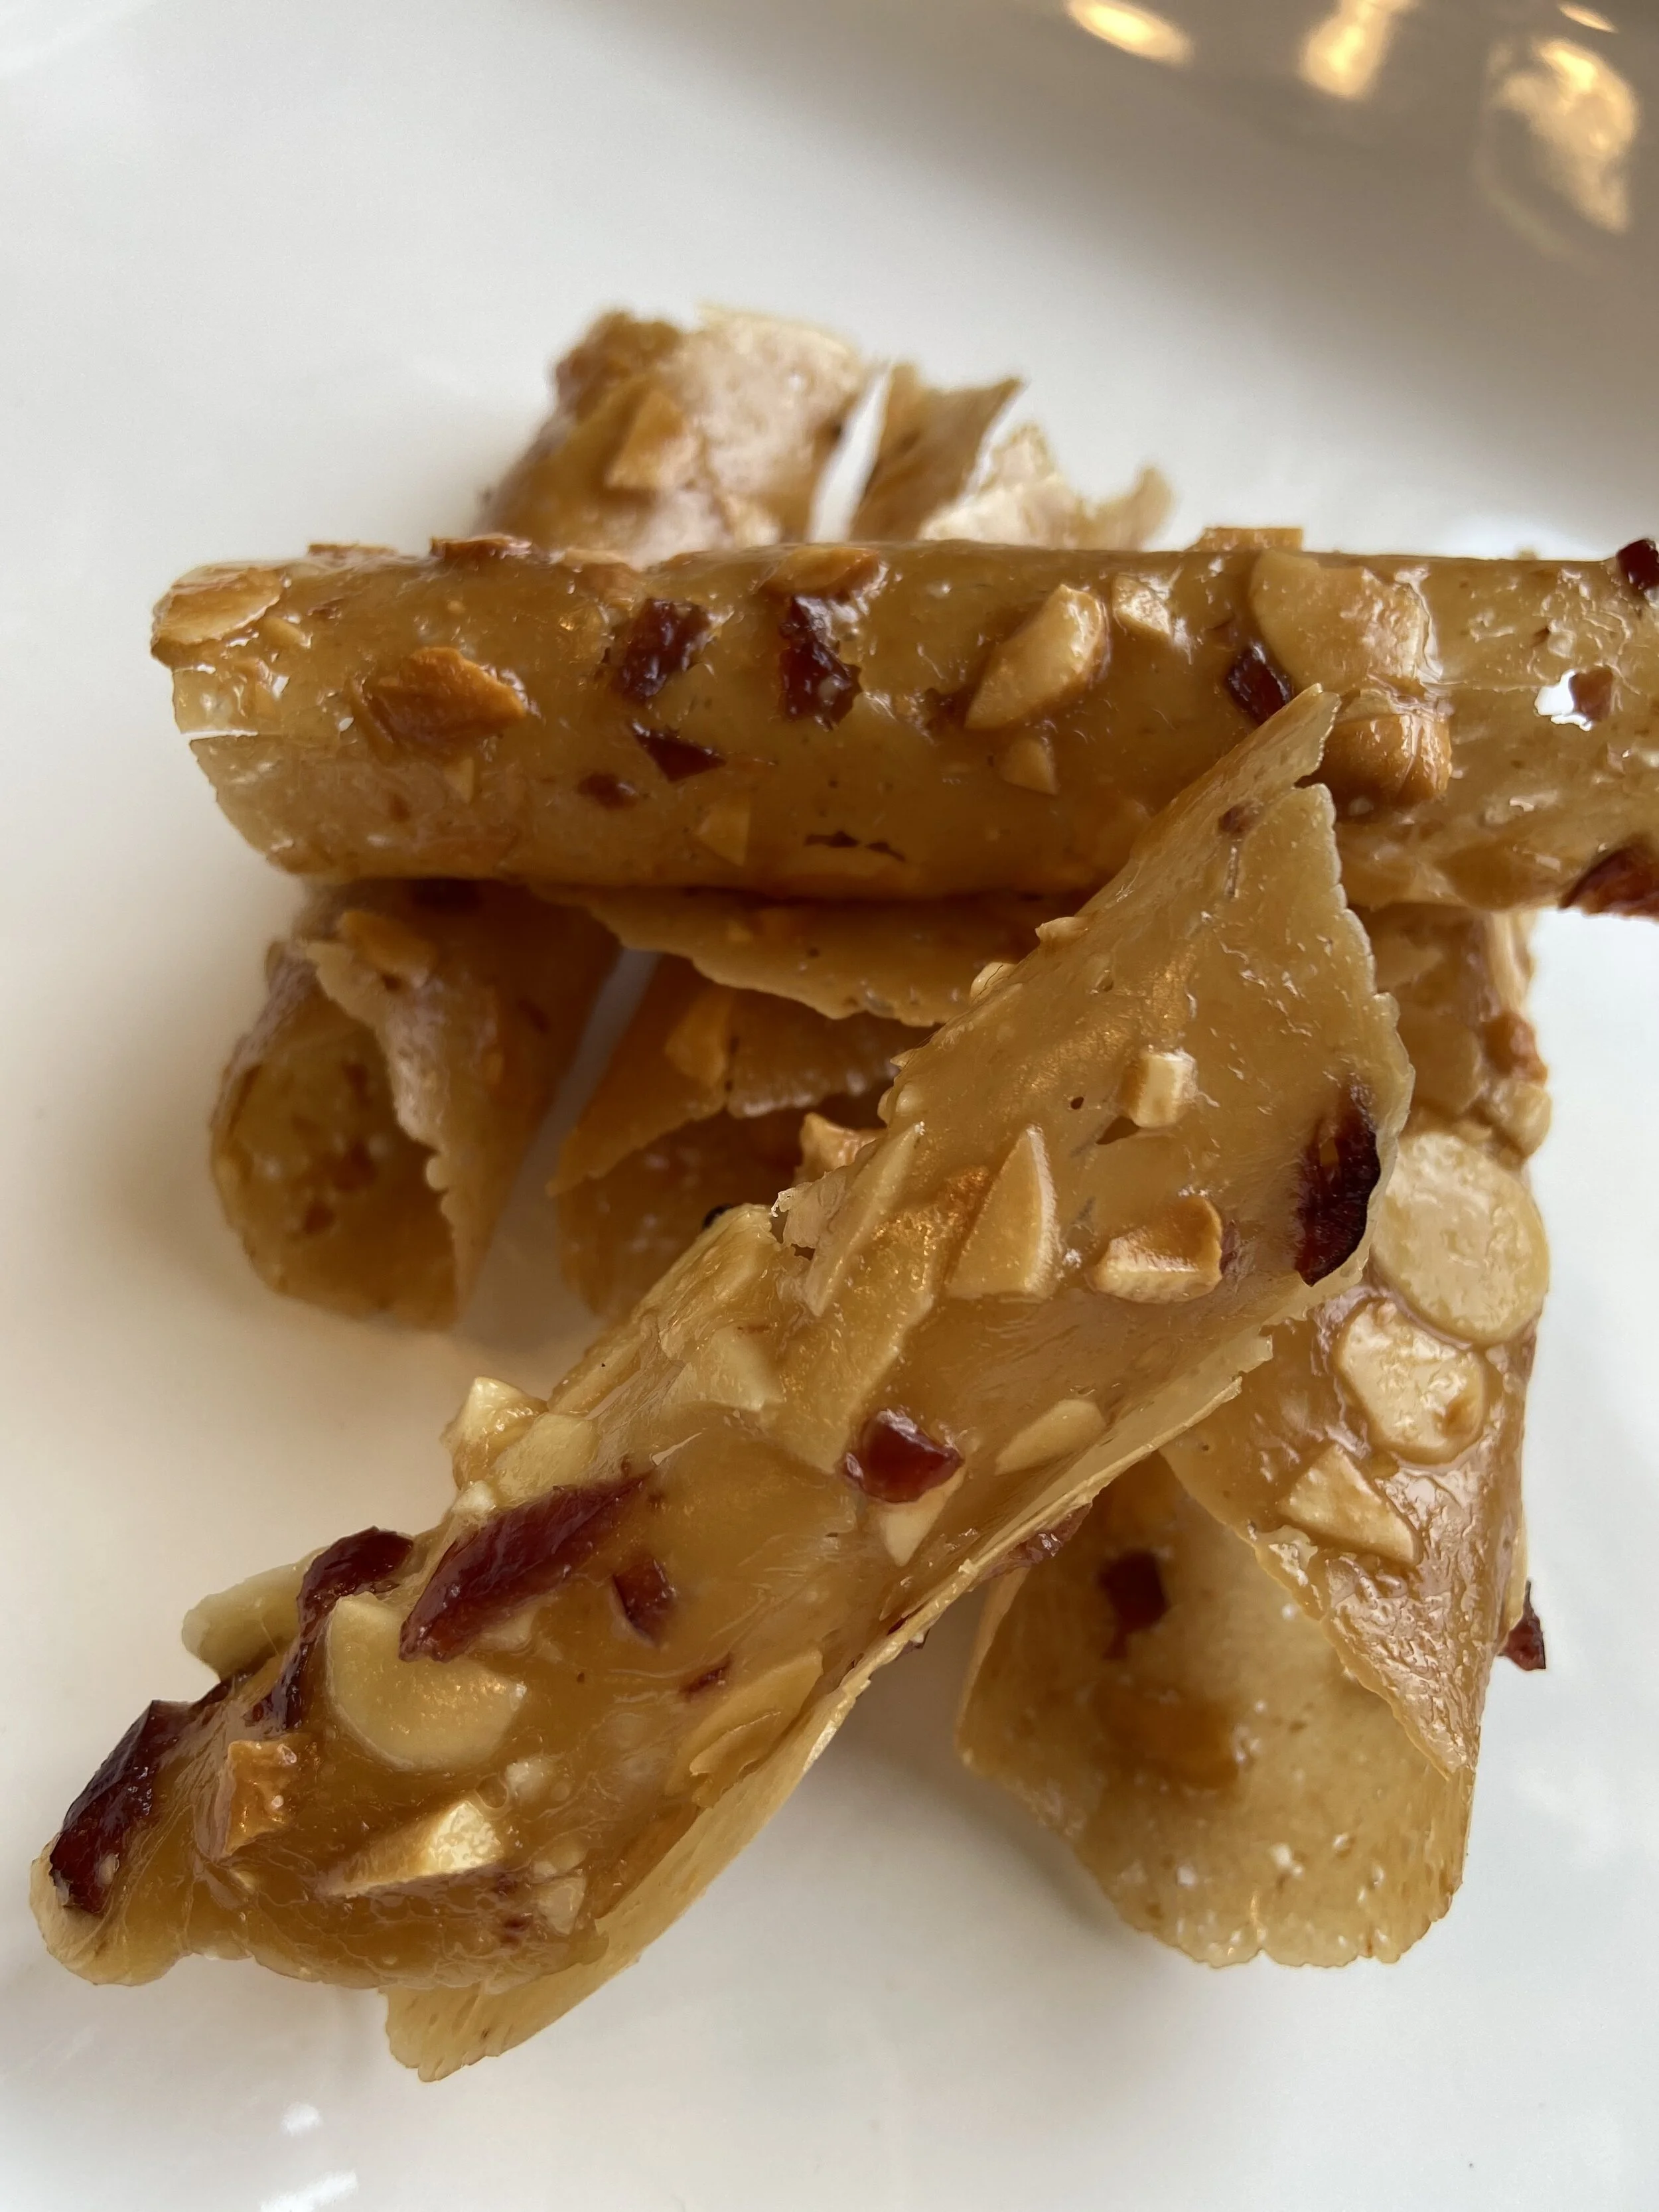
Crispy Florentine Cookies
Florentine Cookies
Yield 15-24 depending on your shaping skills
Preheat your oven to 350*F
1/4 cup Butter
1/3 cup Brown Sugar
1/2 cup Nuts, finely chopped (you can also add some dried fruit) - I used slice almonds, cashews and a little bit of dried cranberries
pinch of Salt
1 Tablespoon Corn Syrup
1/2 teaspoon Grand Marnier (optional)
In a pot heat together the butter, brown sugar, corn syrup and salt until its all melted and combined, takes about 1-2 minutes.
Stir in nuts and Grand Marnier.
Let cool until it thickens and is cold enough to handle - 5-10 minutes.
with a teaspoon place about 6 scoops of batter on a silat or parchment lined tray. Keep them at least 3” apart as these babies spread a lot! If you are planning to shape them, you might want to start with 2 or 3 on a tray until you get a feel for it.
Place your tray in the oven and bake for 5-10 minutes, the batter should bubble, spread and turn golden brown, then it’s ready. Mine took 7 minutes.
If you want them to be circles then these babies are ready to go straight out of the oven. If you want to shape them like I did, into little cannoli shaped tubes, you will keep touching the edges of your cookies when they come out of the oven, using a offset spatula or a knife, something thin that will be able to slip under the cookie, until the cookie hardens just enough to lift off the tray, then while warm, wrap it around the handle of a wooden spoon. Hold it there for a few seconds and it should cool enough to slip off and you have a fun tube shape!
Once you shaped all the cookies on your tray you will reload it with more batter and bake the next tray. If you want to shape them I would recommend only doing one tray at a time as you have to work very fast. Don’t worry if some break, it is going to happen, they are very breakable, but still super yummy!
Now you get to eat them or you can dip them in chocolate which is equally as yummy!