
Baking recipes
Scroll through our posts below to try all sorts of delicious baking recipes from our instagram baking videos. New baking videos are posted the first week of each month on Instagram and Facebook.
To easily find one of our recipes type below:
Hey! Nice (Cinnamon) Buns!
Cinnamon buns…can you think of a GREATER bun?! The answer is no! Sweet, soft and oh so gooey! They are the perfect breakfast, lunch or dinner! This recipe has a delicious layer of “goo” aka caramel on top (some might call it a sticky bun!), but if you are more of a cinnamon bun with icing type of person, omit the goo and top with your favourite icing instead.

Yield: 12 buns (or you can make 8 ginormous buns)
Ideally use a 9”x13” pan but you can probably use 2 pie pans if you don’t have one
Dough:
3 cups All purpose flour
1/4 cup milk powder
1 1/2 teaspoons salt
2 teaspoons or 1 packet Instant Yeast
2 Tablespoons Sugar
1 1/4 cup milk, warm to the touch but not boiling
1 egg
1/4 cup butter, melted
In the bowl of an electric mixer, place the milk, egg and melted butter.
In another bowl toss together the flour, milk powder, salt, yeast and sugar just to combine.
Pour the dry ingredients on top of the liquid ingredients in the mixer bowl and then mix using the dough hook attachment for 5-10 minutes, or until the dough forms a smooth ball. The dough will still be a little sticky.
Place the dough into a greased bowl and cover. Let rest at room temperature for about 1 hour or until doubled.
Goo:
1/3 cup butter
1/2 cup Brown Sugar
1/2 cup Corn syrup, honey OR maple syrup
1/4 cup heavy cream (if you don’t have cream, omit this and increase your butter to 1/2 cup)
pinch of salt
Combine all the ingredients: butter, brown sugar, syrup, cream and salt in a small pot.
Bring to a boil while stirring, basically we are melting the butter and sugar together, so you don’t need to cook it very much. You can also do this in the microwave if you prefer.
Pour the goo into a greased 9”x13” pan and set it to the side until your dough is ready.
Filling/Assembly:
1/3 cup - 1/2 cup Butter, very soft basically you want it to be the texture of mayonnaise, so almost melted
3/4 cup - 1 cup Brown sugar
1-2 Tablespoons Cinnamon
1/2 cup Add-in (optional): toasted pecans, toasted walnuts, raisins, chocolate chips, OR dried fruits
Once your dough has doubled in size place it onto a lightly floured surface and shape it into a rough rectangle shape. Then roll out into a large rectangle using a rolling pin or wine bottle, whatever you’ve got on hand! Since we are making 12 buns, make sure your rectangle is at least 12” wide, but if it gets a bit longer that is no problem. Mine probably was about 15”x9” in the end.
Smear your super soft butter all over your rectangle but leave a strip about 1” wide across the top edge without any butter. This strip is going to be the end edge of our roll which we will use to stick the dough to itself and seal the log.
On top of the butter sprinkle a nice even layer of brown sugar all over, depending on the size of your rectangle you might need a little more sugar, or a little less, but as long as it’s nicely covered you are set, the measurements for the filling are more by feel, so if you have leftover don’t worry!
Next, sprinkle the cinnamon all over the sugar to your liking. If you are putting any add-ins into your cinnamon buns, you can sprinkle them all over the cinnamon sugar layer now as well.
Now time to roll! Starting at the edge closest to you, move from one side to the other, rolling the dough on top of itself, tucking in the dough into the layer of cinnamon sugar, until you reach the top edge that doesn’t have any butter on it. Your dough should look like a big wormie and be lying on top of the un-buttered strip of dough.
For ease, I like to roll my wormie over so the edge of the dough is on top, then you want to seal the dough together by pinching it all the way from one side to the other so it won’t unravel when we cut it.
Now using your sharpest knife cut the wormie into 12 even-ish pieces. The easiest way for me to do this is to cut the wormie in half, then you will have 2 pieces. Now, take each of those pieces and cut them in half, so now you should have 4 even-ish pieces. Then cut each of those 4 pieces into thirds. Viola! 12 even-ish pieces!
Now grab your pan that has the goo at the bottom (or if you don’t want goo, just make sure your pan is very well greased, or lined with greased parchment). Place your buns cut side down in the goo into the pan, in a 4 across and 3 down pattern.
Cover the pan and let sit at room temperature until doubled and starting to reach the top edge of the pan, about 1 hour. If you want to serve these for breakfast, make your buns the day before, then cover them and place into the fridge overnight. In the morning, take your buns out about 2 hours before baking so they can come up to room temperature and then continue to proof so they are doubled and reaching the top edge of the pan.
While your buns are rising, pre-heat your oven to 350*F.
When your buns have doubled, pop the pan onto a cookie tray (this is purely to catch caramel drips from falling into your oven which would be the worst to clean…speaking from personal experience) and then place the pan with cookie tray into the middle of the oven and bake for 20-30 minutes or until golden brown and sounding hollow when you tap on the dough.
Let the pan sit for about 5 minutes at room temperature so it’s not boiling and then using oven mitts and being EXTREMELY careful, place a baking tray or a large platter (something that is larger than your cinnamon bun pan so it can catch the caramel) on top of the cinnamon buns, and flip them over and remove the baking pan. All your buns and delicious caramel should pour out onto the baking tray/platter, but if there are a few stragglers, just grab a spatula and scrape them out.
Now time to devour these delicious babies! Best served warm!
Cheese-y Mushroom "Danishes"
These danishes are made with puff pastry instead of the traditional yeast raised Danish dough. For this recipe I used half of the batch from the puff pastry dough I made for Sausage Rolls, you can check out that recipe if you would like to make your own puff pastry or you can just use the puff pastry from the freezer section of your grocery store! These little danishes are buttery and full of flavour! You can fill your danish with anything (sweet or savoury!) and they make an awesome and impressive appetizer! I am filling mine with some caramelized onions, mushrooms, ham and swiss cheese!
Cheese-y Mushroom “Danishes”
Yield: 9 large sized danishes
Preheat your oven to 400*F
1 sheet of puff pastry (if buying premade) or 1/2 batch of my puff pastry dough (see Sausage Rolls recipe)
~1 Tablespoon Dijon Mustard
~1 cup grated Swiss Cheese (or your favourite cheese!)
2 slices of Ham Deli Slices (or your favourite thinly sliced meat), cut into quarters
Egg Wash - 1 egg whisked up with a pink of salt and sugar
Mushroom Filling:
1 Tablespoon Butter
1/2 an Onion, diced
1-1 1/2 cups of Mushrooms, chopped
1/2 teaspoon Dried Thyme
1/2 teaspoon Dried Rosemary
1/4 teaspoon Salt
1/4 teaspoon Pepper
1-2 Tablespoons Wine (white or red), or both or water - anything you have on hand!
1/2 teaspoon Worcestershire Sauce (optional)
In a frying pan melt your butter, then add your onions, thyme, rosemary, salt and pepper. Cook over medium heat until onions start to brown and caramelize.
Add your mushrooms and continue cooking until the mushrooms start to brown and release their juices.
Deglaze your pan by pouring a tablespoon or two of wine into the pan and scraping the bottom to release any of those bits that have stuck on. Add your Worcestershire sauce.
Cook for a minute or so while stirring until most of the liquid has bee absorbed. Pour into a bowl to cool and Taste and season to your liking!
Roll out your puff pastry into a large square about 1/8” thick.
Using a pizza cutter or knife, trim the edges and then cut into 9 portions, I did 3 rows horizontally and 3 rows vertically.
Going diagonally from on corner to the other, smear a thin layer of dijon mustard down the middle.
I sliced my deli ham into quarters, then placed one quarter on top of the dijon mustard.
On top of the ham but keeping to the centre area of your square, scoop about 1 tablespoon of the mushroom mixture.
Then place a large pinch of shredded cheese on top of the mushrooms.
Now you can bake the danish just like this, or make it into a shape!
To shape, grab the corner with the least toppings and fold it over so it’s reaching across the cheese and filling. Lightly egg wash, then grab the opposite corner and fold it on top of the first one, so they are “hugging” your filling. Egg wash the other side.
Sprinkle the tops of your danishes with coarse salt or pepper (optional)
Bake in a preheated 400*F oven for about 25 minutes or until golden brown!
Eat!
Perfect Peanut Butter Cookies!
An oldie but a goodie! Peanut butter cookies are the perfect combination of sweet and salty! They combine that delicious nuttiness of peanut butter with the chewiness of a cookie and it’s pretty much perfection! These cookies are crispy with a soft, chewy centre, but if you like the crispier bake them for a minute or two longer, and if you like them chewier, pull them out a minute or two earlier.

soft and perfect!
Peanut Butter Cookies
Yield: 8-12 depending on how large you scoop them
Preheat your oven to 350*F
1/4 cup Butter, soft
1/4 cup Peanut Butter
1/2 cup Brown Sugar
1/4 teaspoon Salt
1/2 teaspoon Baking Soda
1 teaspoon Vanilla (optional)
1 Egg
3/4 cup Flour
Granulated Sugar for sprinkling on top (optional)
In the bowl of your mixer, whip together the butter, peanut butter, brown sugar, vanilla, baking soda and salt until fluffy, about 3-5 minutes.
Add in your one egg, and continue whipping for about 1 minute, or until combined and fluffy.
Add your flour into the mixture and mix until combined, being sure to scrape down the sides of the mixing bowl to get any chunks of butter combined.
Scoop onto a parchment lined baking tray (or if you don’t have a liner, just spray with baking spray oil. I used a ice cream scoop but you can just use a spoon. Leave at least 2” between cookies so they don’t bake into each other.
Sprinkle the tops of your cookies with granulated sugar for a little extra crunch and sparkle!
Bake in a preheated 350*F oven for about 10-12 minutes, or until lightly golden.
Let cool and eat!
Roasted Tomato Sourdough Bread!
Sourdough bread is SUPER popular right now! Instead of adding yeast to your dough, you use a sourdough starter which absorbs natural yeast from your environment to give rise to your dough, along with LOTS of tangy flavour! This bread is made with roasted tomatoes, but you can also take that out and just use water if you want a plain flavoured loaf. The process of this bread takes about 1 day, but there isn’t any kneading or mixers involved, just a little tending every few hours. The long wait is what helps build lots of delicious flavour into your loaf.

Crispy Crust full of Tomato Flavour!
Roasted Tomato Sourdough Bread
Yield: 1 loaf
Preheat oven to 375*F to bake tomatoes
Preheat oven to 450*F WITH a cast iron pot with it’s lid inside to heat up as well for baking bread
Tomato puree (you can skip this step and use 2 Tablespoons of tomato Paste if you like!)
1-1 1/2 cups Tomatoes cut into a few large chunks - I just used up any random chunks of tomato or wrinkly tomatoes that were in my fridge
3 cloves of Garlic
1 teaspoon Olive oil
Salt and Pepper
Bread:
1 1/3 cup room temperature water mixed with Tomato puree from above
1/2 cup Sourdough Starter (about 100 grams) - should be nice a bubbly and when you place it in a glass of water, it should float to the top, that means it’s ready to go!
1 teaspoon Dried Basil
2 1/3 cup Flour
1 1/2 teaspoons Salt
For the tomato puree, toss together all the ingredients - tomatoes, garlic, olive oil and salt and pepper in an oven safe pan, and bake for about 30 minutes or until the tomatoes start to roast and break down.
Let tomatoes cool, then puree in a food processor or blender until smooth.
To make dough, place your tomato puree into your measuring cup, then add your water until you get 1 1/3 cup liquid total. We need 1 1/3 cup liquid total, so it doesn’t matter how much tomato puree you end up with as long as the total of tomatoes and water equals 1 1/3 cup.
In a large bowl with a lid, combine your tomato/water liquid, the sourdough starter, dried basil and flour. Stir until there are no bits of dry flour peaking out.
Cover the bowl with a lid and let sit at room temperature for 1 hour.
At this point sprinkle your salt on top and lightly press it into the dough but poking your fingers into the dough all over the top.
Now we are going to do 4 folds.Grab one side of the dough, lift and fold it on top of itself, then turn the bowl 90 degrees and repeat until you get back to where you started and have done 4 folds.
Cover the bowl and let sit at room temperature for 30 minutes.
Repeat step 7 and 8 until you have done the 4 fold FIVE TIMES! This will take 2.5 hours. I put a sticky note on top of my bowl and mark each time I do the folds so I don’t loose track.
Once all your folds are finished, put the lid on and let your dough sit at room temperature for about 1 hour, then place into the fridge overnight or about 12 hours.
After the dough has rested, take it out of the fridge and let it sit for about 2 hours at room temperature.
Plop your dough out onto a floured surface and lightly press it into a rough rectangle shape.
Fold the dough into thirds, like you are folding a letter (Take the base third and fold it over, then fold that over on top of itself).
Now turn the log of dough and take the narrowest end and roll it up into a chubby little bundle.
Now pinch together all the seams so they can’t come apart.
Grab a bowl or basket (or if you have one, a banneton) and line it with a super well floured clean tea towel.
Place your dough ball seam side UP into the tea towel lined bowl, then flip any overhanging towel edges on top of the loaf to cover it.
Place your loaf into the fridge to chill for 3-4 hours (this will help build a little extra flavour), or 1 hour at room temperature.
Heat up your oven to 450*F with a cast iron pot with a lid inside of it, so your pot gets really hot as well. Grab a piece of parchment paper that will fit into the bottom of your pot.
Once your bread is ready to go, flip the bread out of the bowl onto your piece of parchment that fits into the pot and peel off the tea towel. Sprinkle the top of the bread with a little extra flour (this will help your scoring design POP!)
Using a sharp knife or clean exacto blade make a long slice across the top of your bread, just cutting through the top “crust” of the bread, not going too deep into the loaf, this is called scoring and it’s going to allow your bread to expand without cracking. You can also score pretty patterns onto your dough, google has lots of inspiration, leaf shapes, wheat designs, so many ideas! Bakeries score different designs on each bread so they can tell what flavour each loaf is!
Grab your super hot pot out of the oven and place your dough into the pot by lifting it up with the parchment paper.
Toss 1 ice cube into the pot under the parchment paper and quickly place the lid on top, this is going to give it a little extra steam and help make a nice crust!
Immediately place your pot back into the hot oven and bake for 45 minutes.
Remove the lid of your pot and continue baking for about 10 more minutes, or until golden brown and sounds hollow when you tap it.
Remove from pot and place on a wire rack to cool!
Eat!
Pizza Dough!
Pizza party time! Pizza dough is fairly easy to whip together and then you can have both a delicious meal, and a fin activity for your family. Each person can make their own pizza with whatever toppings they like, super fun!

It’s a pizza party!
Pizza Dough
Yield: 3 approximately 9-10” diameter pizzas
Preheat the oven to 450*F with your Cast Iron Pan or Pizza Stone inside so it gets hot hot hot!
2 2/3 cup Flour
1 teaspoon Instant Yeast
1.5 teaspoon Salt
1 teaspoon Sugar
1 cup Water, warm
1 Tablespoon Olive Oil
Toppings for your pizza like pizza sauce, cheese, pepperoni, vegetables, pineapple, anything!
In the bowl of your mixer, combine your dry ingredients - flour, yeast, salt and sugar, toss to combine then pour in your liquid ingredients - warm water and olive oil
Knead in the mixer for about 6 minutes, until you get a nice firm dough ball, and the dough is not sticking to the sides of your bowl, but wrapped up around the hook.
Place your dough ball into a greased bowl with a lid and let sit at room temperature for about an hour or until doubled.
Preheat your oven to 450*F with your cast iron pan inside of the oven (or pizza stone) so it gets nice and hot.
If you want to make this ahead of time, you can put your dough in the fridge now, otherwise divide the dough into 3 even portions and take each portion and roll out into a roundish shape 9-10” in diameter.
Add whatever toppings you like to your pizzas.
Once your pizzas are ready, pull your hot pan out of the oven and slide one pizza onto it and quickly place it back into the oven.
Bake for 5-10 minutes or until the cheese is melted and the bottom of your pizza is golden brown and crispy.
Once your pizza is ready pop it out of the pan and immediately place the next pizza on it and pop it back into the oven, and continue until they are all baked!
Now it’s pizza eating time!
Cheese Crackers!
Who doesn’t love cheese crackers, a favourite since the days of eating handfuls of goldfish crackers on the playground! These delicious cheesy crackers can be modified to incorporate whatever grate-able cheese you have in the fridge, which results in SO many fun flavours! I went with cheddar and parmesan because that’s what I had on hand, and as we know, it’s quarantine so I am avoiding the store.

Little cheese bites!
Cheese Crackers
Yield: depends on how you cut them, lets say about 100 small crackers!
Preheat your oven to 350*F
1/2 cup Flour
1 teaspoon Sugar
1/2 teaspoon Salt
1/4 teaspoon Baking Powder
1/4 teaspoon Smoked Paprika (you can leave this out or replace it with other spices, things like onion or garlic powder, italian seasoning, cajun seasoning, even rosemary or thyme would be good!)
2 Tablespoons Cold Butter, cubed
about 115g Cheddar Cheese, grated on the smallest sized grater you have (you can replace this with another cheese such as swiss, mozzarella, havarti, whatever you got!)
2 Tablespoons grated parmesan (optional)
1-2 Tablespoons of cold milk or water
Coarse salt for the tops
In a bowl combine all your dry ingredients - flour, sugar, salt, baking powder and smoked paprika (or other spices)
Toss in your cold butter and cheese and combine together by pinching and rubbing the dough with your hands until it looks like coarse sand. We ideally want there to be no large butter chunks left but it still looks crumbly.
Now add your milk (or water) a little bit at a time, I used about 1.5 Tablespoons, but it will vary depending on how dry your cheese is, something like an old cheddar or a parmesan is going to need a little more moisture, while something like a havarti is not as dry and will need a little less. So just add a little bit at a time, stirring them together until you can grab a ball in your hand and when squeezed it will stay in a ball.
Press the dough together into a disk and wrap with saran wrap and chill for at least 30 minutes.
Roll out your dough onto a lightly floured surface and cut into small squares using a pizza cutter, or whatever shape you like!
Bake in a preheated 350*F oven for about 10-15 minutes or until lightly golden on the bottom and cheese-y smelling!
Let cool and eat! Store any extras in an airtight container or baggie.
Lavash Crackers
What’s better than cheese and crackers…cheese and HOMEMADE crackers! Lavash crackers are a super thin flatbread that you can top with any type of spices and seeds to customize to your liking. They look beautiful on a cheese board as you can break them into large pieces that you can place in a glass for added height.

Crunchy Crackers!
Lavash Crackers
Yield: about a 15”x10” rectangle
Preheat oven to 400*F when you are shaping the dough.
Dough:
3/4 cup Flour
1/4 teaspoon instant Yeast
1/3 cup water, warm
1 teaspoon Honey
1/2 teaspoon Salt
Topping:
Olive oil and seasoning of your choice - I used a pre made spice blend normally used for steak, but whatever you like is great! Or you can just use coarse salt.
In the bowl of your mixer combine all the ingredients for the dough.
Mix with the dough hook on your mixer for about 10 minutes, or until a non-sticky dough ball forms.
Place your dough ball into a grease bowl with a lid for about 1-2 hours at room temperature.
Once your dough has rested roll it out as thin as you can with a rolling pin, then place on the BOTTOM side of a baking tray that you have greased and use your hands and rolling pin to stretch and pull the dough as thin as you can.
Drizzle your dough with a little olive oil and smear it over the dough so it is fully covered.
Sprinkle the dough with your seasonings.
Bake in the preheated 400*F oven for 5-10 minutes, keep an eye on these as they can go from unbaked to burnt very quickly, I check the crackers every minute or two. My crackers took 9.5 minutes. The dough will be crispy and golden, thinner pieces will be a bit darker but that is fine.
Let your crackers cool for at least 10 minutes before cracking into pieces and eating!
Hot Cross Buns! Hot Cross Buns! One a penny, two a penny, Hot Cross BUNS!
Hot cross buns! These festive Easter rolls are rolling with flavour! They are made of a lightly sweetened dough, studded with dried fruit, orange zest and a little dash of cinnamon! Apparently they were created as a sweet treat to end your fasting for lent, but don’t you worry, no fasting is required to indulge in these babies!

I forgot to take a picture before taking a bite…whoopsie!
Hot Cross Buns
Yield: 6 buns (I fit them into a 10”x6” loaf pan so they would bake into one another, but use whatever pan you like, or double the recipe and it will fit perfectly into a 9”x13” pan)
Once dough is shaped, preheat your oven to 350*F
Bun Dough:
2/3 cup Milk, warm but not boiling
1 teaspoon Instant Yeast
2 Tablespoons Butter, melted
2 Tablespoons Sugar
1 teaspoon Salt
1 Egg
1 1/2 cups Flour
1 teaspoon Cinnamon
zest of 1 Orange (or if your orange is giant like mine, I just tested 1/2 of it)
Dough Fruits:
1/2 cup Dried Fruit - I used raisins and dried cranberries
1 teaspoon Grand Marnier (optional)
Cross Dough:
2-3 Tablespoons Flour
enough juice of your orange (or water or milk) to get a nice consistency, about 1-2 Tablespoons
Egg Wash:
1 Egg
pinch Salt
pinch Sugar
Place your dried fruit into a small bowl, then cover with boiling water and set to the side.
In the bowl of your mixer, combine all the ingredients of your dough - milk, yeast, butter, sugar, salt, egg, flour, cinnamon and orange zest.
Using the dough hook on the mixer, knead the dough on medium-low speed for about 10-15 minutes or until the dough comes together into a sticky ball around the dough hook. This is a pretty sticky dough, but it should be VERY glutinous in you grab it and not be sticking to the sides of your bowl too much.
Drain your dried fruits and press out any excess moisture, then stir with the 1 teaspoon of Grand Mariner if you are using it.
Now pour your dried fruits into the dough and knead for 2-3 more minutes or until they are combined.
Place your dough into a greased bowl, cover, and let sit at room temperature until doubled, about 1 hour.
Once your dough has rested, place it onto a floured counter and lightly press into circle, then cut into 6 even pieces.
Roll each piece into a ball and place into a greased and lined baking pan.
Once all the dough is in the pan, cover it with some saran wrap, and let it sit at room temperature for about an hour, or until doubled.
While your dough is resting, mix together your cross dough - combine about 3 tablespoons of flour with enough orange juice to create a pipeable consistency (you can also use water or milk for this). Place this into a piping bag or a ziplock bag that you can cut the corner off of to pipe with.
For the egg wash, whisk together your egg with the pinch of salt and sugar.
Once your dough has rested carefully glaze the buns with your egg wash.
Now using the piping bag, pipe a cross on top of each bun.
Bake in a preheated 350*F oven for about 20 minutes, or until golden brown and delicious!
Time to eat before the Easter bunny gets to them!
Puff Pastry with a side of Sausage Rolls!
Puff pastry is a super delicious flaky pastry dough with hundreds of buttery layers! Perfect for making sausage rolls! The puff pastry we are making is the SLIGHTLY faster “quick puff” or “rough puff” which is a little easier! Yay!
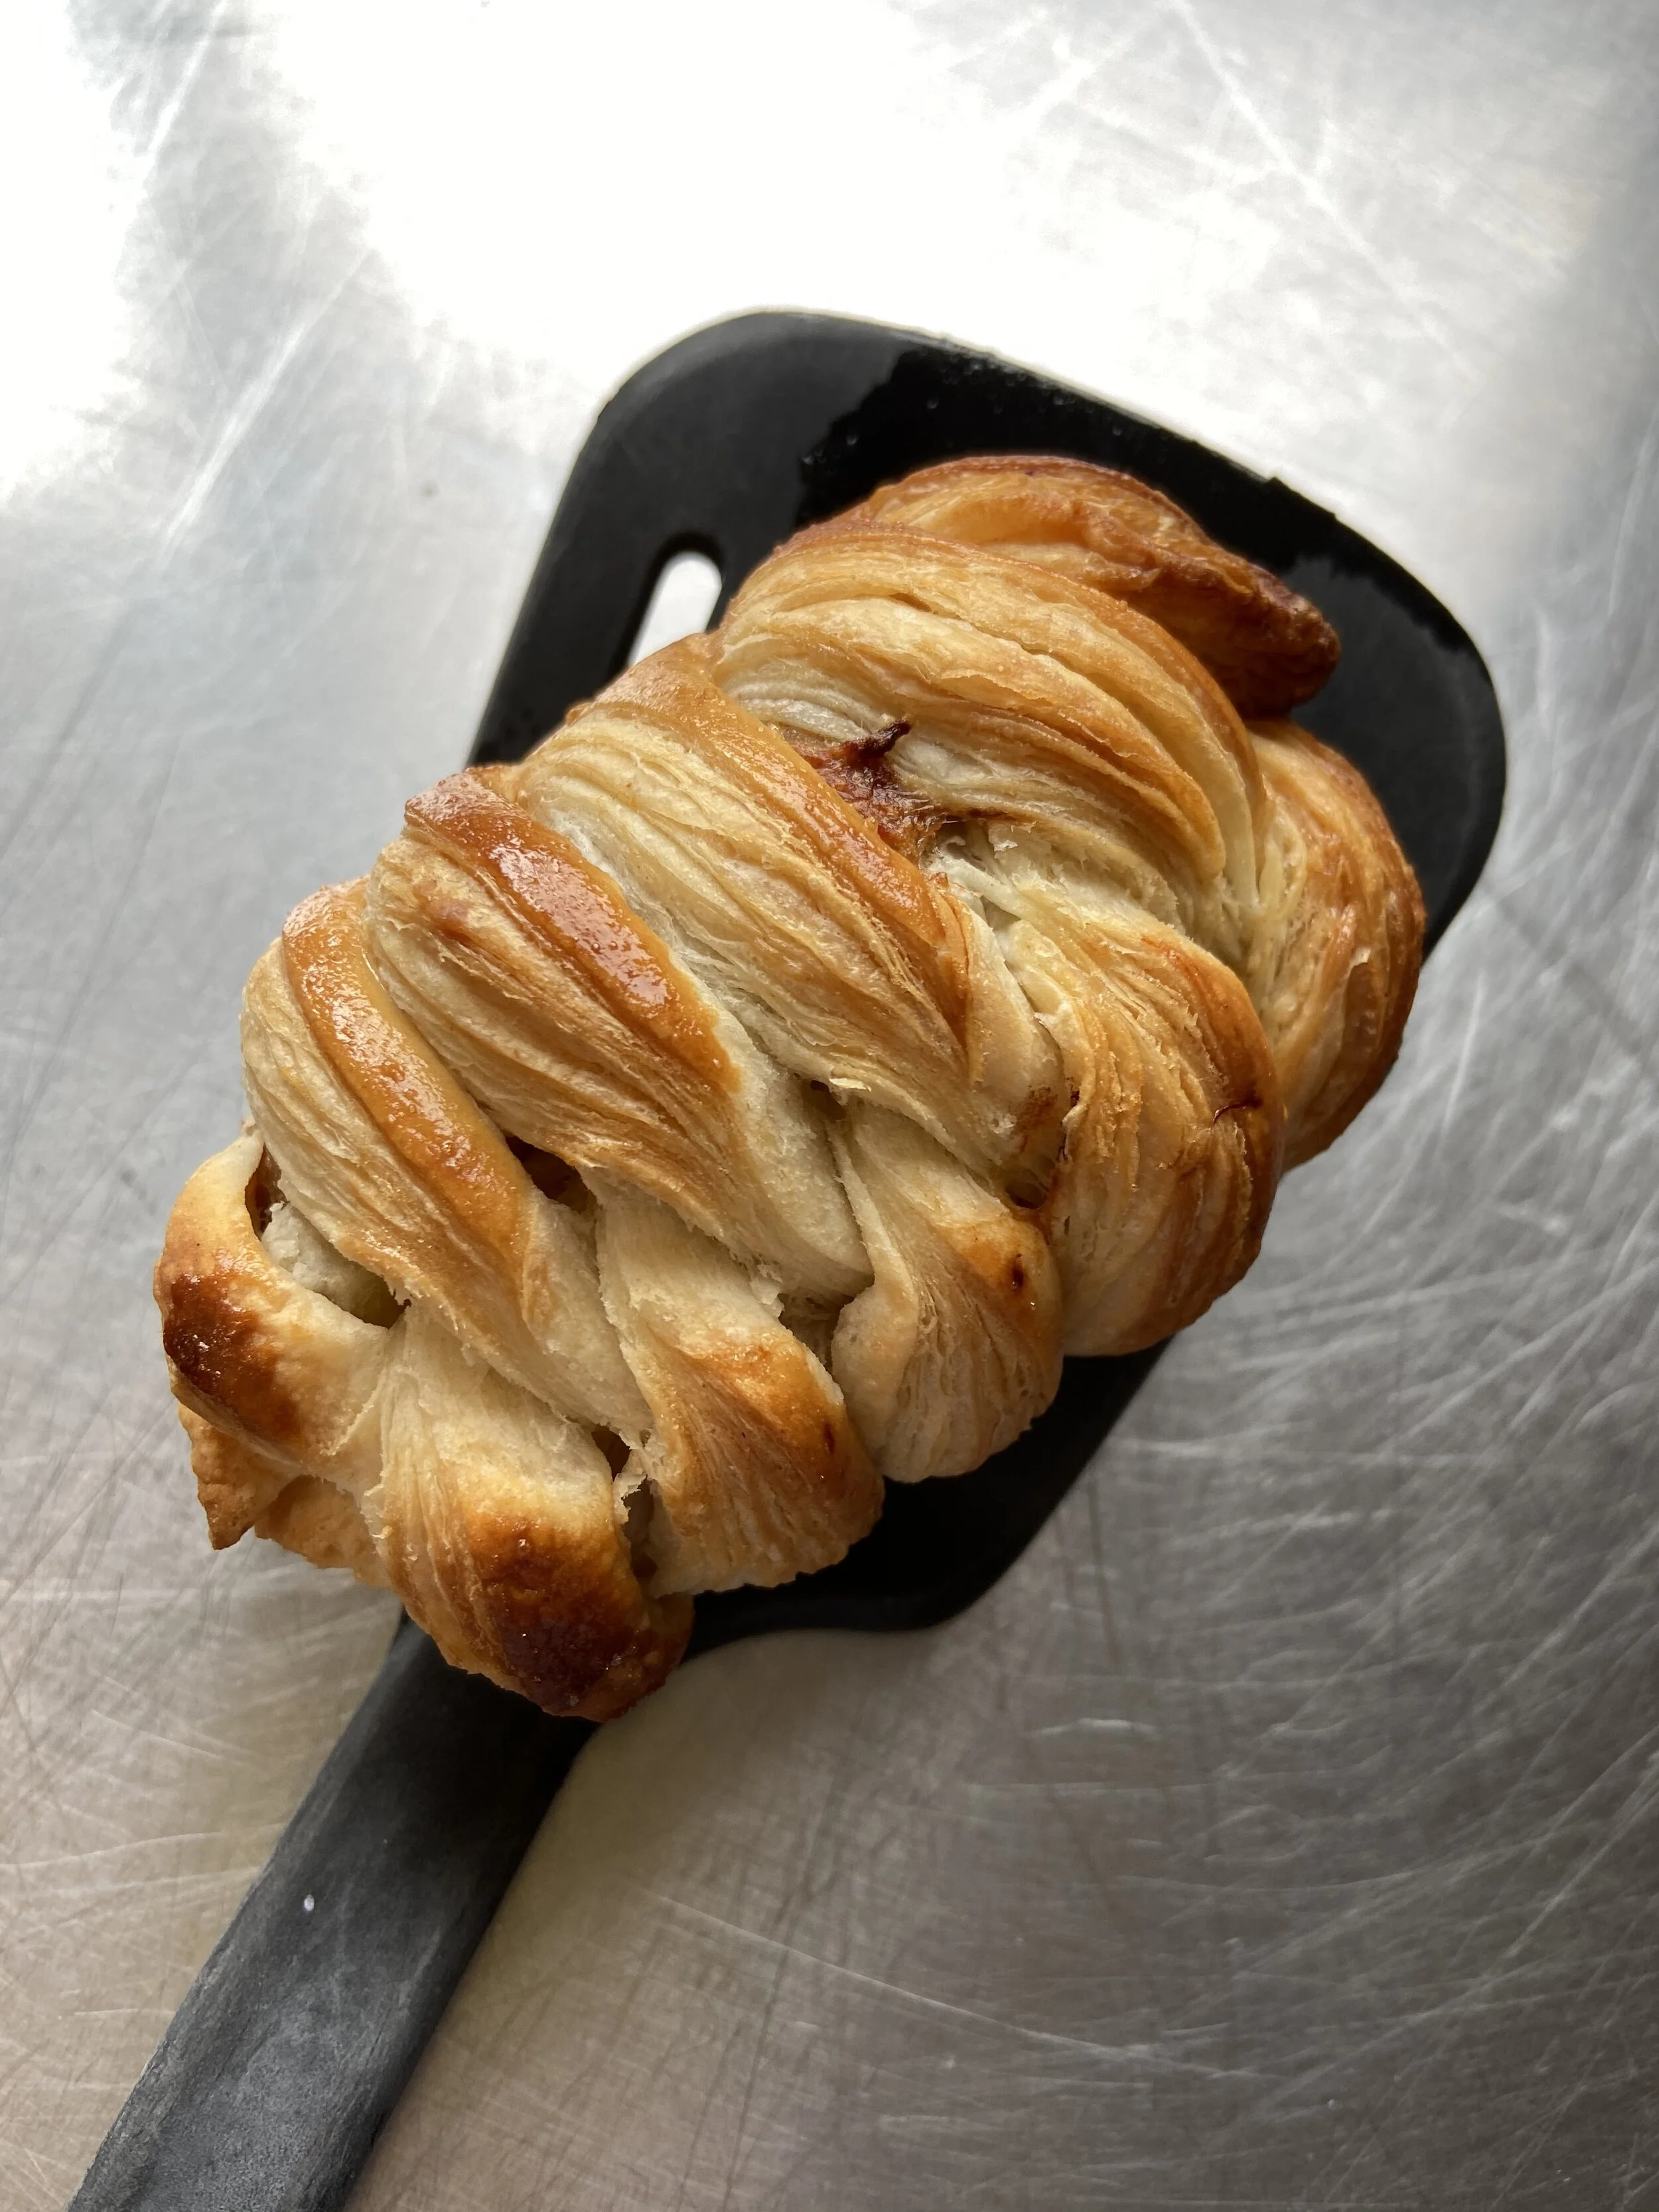
Look at those flaky layers of puff pastry in our sausage roll!
Puff Pastry
Yield: about 1 pound of puff pastry dough - good for 12 large sausage rolls, or 2 tart tatins!
Preheat your oven to 425*F once you are ready to bake your puff pastry
1 3/4 cup Flour
1 cup Butter, cold - cut into large cubes
1 teaspoon Salt
1/2 cup Water, cold
In a bowl mix together the flour, salt and cold butter, rubbing the butter into the flour but leaving large nickel sized chunks - we want to keep lots of big butter chunks so we can roll them into layers on our next steps!
Pour the cold water into the flour mixture and stir it together until it can be pressed into a ball. You might need to add a little more or less water depending on how your dough is working! I like to dump the dough out onto my counter and press it together into a rectangle shape, then saran wrap it and place in the fridge for 30 minutes.
Once your dough has rested, roll your dough out into a large rectangle, then fold it into 3rds like a brochure, so the bottom one third of the dough folded up, then the top one third folded down on top of it. This is called a “3 fold”
Roll out your folded dough and repeat the 3 fold again, then wrap in saran wrap and put in the fridge for 30 minutes.
Once chilled, you will repeat the 3 fold 2 more times, then wrap and put in the fridge for 30 minutes.
Now your puff pastry is ready to go! You can store it in the fridge or in the freezer. I cut my puff pastry in half, used one, and popped the other into the freezer for another time!
Sausage Rolls
Yield: 6 large ~3” long rolls
Preheat oven to 425*F
1/2 batch of Puff Pastry
2 Sausages (I used Spulumbos Chicken Apple Sausages but use your favourite!)
2 teaspoons Dijon Mustard
Egg wash (one egg with a pinch of salt and sugar wicked together)
Roll your puff dough out into a long rectangle about 18” long and 5” wide.
Using a sharp knife cut slits down both sides of your puff dough about 3/8” wide and about 1.5” long on each side leaving a 2” wide UNCUT section in the middle, this is where the sausage is going to go.
Smear a little mustard down the middle of your dough where you didn’t cut and then scoop your sausage down the middle from top to bottom, but not going on top of the cut strips on either side.
Starting at the top you will grab one of the cut strips and pull it across the sausage towards the other side, then grab the top strip from the alternate side and pull it across in the other direction so the strips are criss-crossing. Continue down the entire strip of sausage and pinch them together at the bottom.
Using a sharp knife cut the sausage roll into 3” long pieces, or whoever she you would like!
Place your sausage rolls onto a lined baking tray, then paint the tops with egg wash.
Bake in the oven for 25-35 minutes or until golden brown and the sausage is fully cooked through.
Eat!
Spinach Dip STUFFED Pretzels!
It’s a soft pretzel…it’s a dip…it’s a SPINACH DIP STUFFED PRETZEL! I love dip! Like everything is better with dip! I could just live off of dip. Some people seem to think it’s inappropriate to just eat straight dip though, so what can one do but stuff it into a delicious soft pretzel! They’re SO good!!!

Pretzels EXPLODING with flavour!
Spinach Dip Stuffed Pretzels
Yield: 4 giant soft pretzels
Once you start shaping your pretzels, preheat your oven to 425*F
Dough:
3/4 cup Milk (or water), warmed
1 Tablespoon Honey
1 1/4 teaspoon Yeast
2 Tablespoons Butter, melted
1 teaspoon Salt
2 cups Flour
Spinach Dip Filling:
1/4 cup Cream Cheese, softened
1 Tablespoon Sour Cream
2 Tablespoons Cooked and drained Spinach (I use the frozen kind, thaw it, and squeeze out the water)
1-2 Tablespoons grated Parmesean
1/4 teaspoon Onion Powder
1/4 teaspoon Garlic Powder
pinch Salt
pinch Pepper
Water Bath:
2 Litres of Water
1/4 cup Baking Soda
Egg Wash:
1 egg
pinch salt
pinch sugar
Coarse Salt for sprinkling on top
In the bowl of your mixer stir together the warm milk and honey. Then sprinkle the yeast on top, and let it sit for about 10 minutes until nice a foamy looking.
Add the rest of the dough ingredients - flour, melted butter, and salt. Using the dough hook on your mixer, knead the dough for about 5-8 minutes, or until the dough is in a ball, not sticking to the sides of the mixer, and no longer sticky to the touch.
Place dough into a greased bowl, cover, and let sit for 1 hour at room temperature.
While the dough is resting, time to make the spinach dip! In a bowl stir together all the ingredients for the spinach dip, taste it, and adjust the seasoning to your taste!
Place the spinach dip into a piping bag, or if you don’t have one, a plastic ziplock bag will work. Then cut the corner/tip of the bag off so you will be able to squeeze out the spinach dip once your dough is ready. Leave at room temperature.
Once dough is rested get your water bath going, you will need a pot with about 2 Litres of water and 1/4 cup baking soda brought to a boil. You can also preheat your oven to 425*F at this time.
Now to roll the dough! Take your dough out of the bowl and cut into 4 equal pieces.
Roll each quarter into a long wormy on the counter, ideally about 18” long.
Now flatten out each wormy with a rolling pin so its about 1.5” wide.
Pipe a line of spinach dip in the middle of your flattened piece of dough from one end to the other.
Now fold the dough around the spinach dip and pinch the two sides together as tightly as possible. Try to make sure no spinach dip squishes out.
Now you should have a long wormy again, but this time it’s filled with spinach dip! Grab both ends, cross them, then place them onto the middle section of the wormy so it looks like a pretzel shape. That is a terrible description, but just look at the photo and make it that shape…or whatever shape your heart desires! Then press the overlapping dough parts together so they somewhat stick. Place onto a lined baking tray that has been lightly floured.
Next you will very gently simmer each pretzel in the baking soda water for about 20-30 seconds per side, then carefully remove and place back onto your baking tray. If your pretzel falls apart don’t worry, just put it back into shape on your baking tray once you remove it from the water.
Whisk together your egg wash - egg, salt, sugar. Then brush it onto your pretzels and sprinkle them with coarse salt.
Pop them into the oven for about 10-15 minutes until golden brown! Yay! Stuffed pretzels and no mall required!